Learning how to arrange a beat for an artist comes down to three moves: map the section lengths off a reference track, build the fullest section first, then strip it back for verses and add it back for the hook. That process takes most producers an afternoon for a first pass, and it turns a strong 8-bar loop into a full song an artist can actually record over.
Most producers stall because they keep adding sounds instead of deciding when things enter and leave. Arrangement is not a sound-design problem. It is a timing problem, and the timing is what the artist performs inside.
If you can program drums and chords but have never finished a track, this guide is built for you. It assumes you know what a DAW is and have a loop you like, and it skips the theory you do not need yet.
Table of Contents
- What You Need
- Step-by-Step: How to Arrange a Beat for an Artist
- 1. Define the Song’s Purpose and Energy
- 2. Build the Core Groove
- 3. Create a Clear Verse-and-Hook Structure
- 4. Use Contrast Between Sections
- 5. Leave Room for the Artist’s Vocal
- 6. Add Movement Without Overloading the Track
- 7. Shape the Intro, Outro, and Final Impact
- 8. Export and Test the Artist-Ready Version
- Common Mistakes
- Frequently Asked Questions
- Conclusion
What You Need
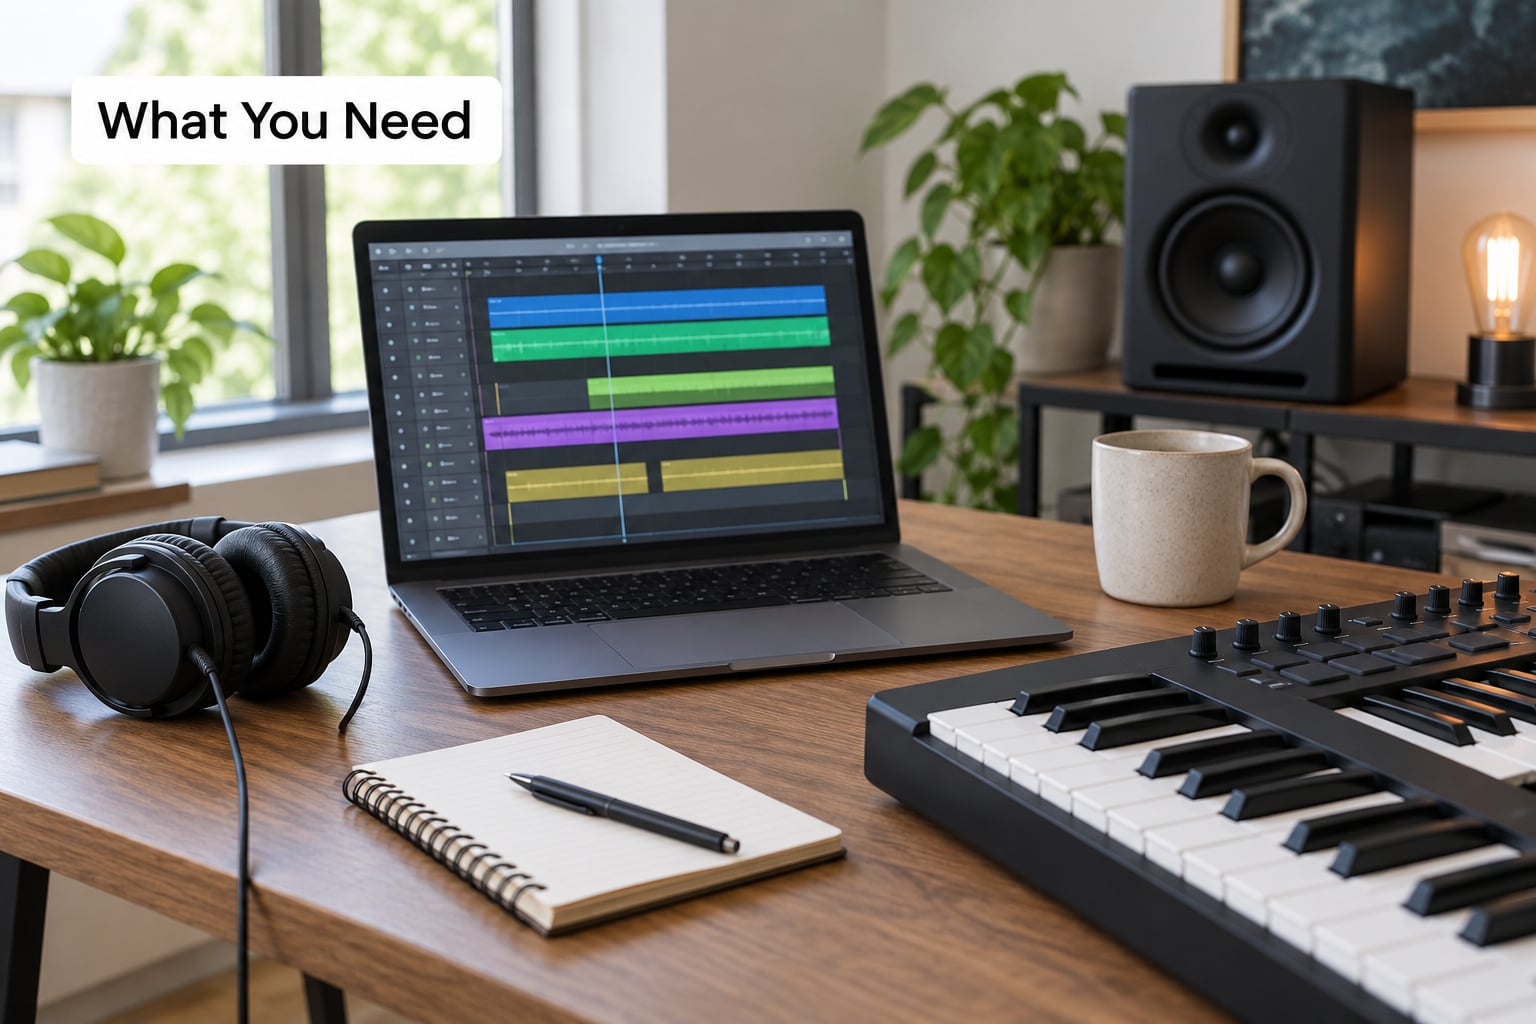
You need five things, and only one of them costs money you probably already spent.
A rough concept. Two sentences about the song’s mood and the artist’s energy level. Not a treatment, not a mood board, just enough that you know whether you are building something restrained or something loud. Every arrangement choice after this point gets judged against that.
A usable loop. The best 8 or 16 bars you have, drums and bass locked. If the groove is not right yet, arranging will not fix it. Producers who try to arrange around a weak loop usually end up rewriting the loop anyway.
Two or three reference tracks. Not to copy, to measure. Pick records in the same lane as the beat and write down where their hooks land in seconds. That single note is what turns this from guesswork into a plan.
Monitoring you trust. Headphones are fine, and for this stage they are better, because you catch low-end build-up you would miss on speakers. Whatever you use, check the arrangement on a phone speaker too before you send it.
A DAW with an arrangement view. Every major DAW has one. Ableton Live calls it the Arrangement View, FL Studio calls it the Playlist Window, Logic Pro calls it the Main Track Area, Studio One has the Arrange page.
That is the setup. A rough idea is genuinely enough to start, and expect the arrangement to change once the artist starts recording over it, because they will lean on certain phrases and ignore others. Plan for one revision, not perfection.
Step-by-Step: How to Arrange a Beat for an Artist
1. Define the Song’s Purpose and Energy
Before you open your DAW, decide the energy arc. Not the whole track, just the shape: does it build, or does it hit once and stay there?
Most artist-ready beats follow one of two shapes. The first is restrained to confident, where a sparse verse leads into a wide, full hook. The second is hook-forward, where the strongest section lands in the first 20 seconds because streaming listeners decide early whether to keep going.
Pick one and write the arc in a sentence. A restrained verse with drums on kick and snare only, a confident hook with the full kit plus bells and a supporting counter-melody, and a final section that is wider than the first hook. That sentence is the brief for everything that follows.
Also decide the tempo range before you commit. Roughly 85-100 BPM suits boom bap and slower melodic work, 130-150 BPM covers most trap, and 140-150 BPM covers a lot of drill. Changing tempo after the artist has written to the beat is painful, so settle it now.
2. Build the Core Groove
The core groove is the small group of elements that plays everywhere: kick, snare, 808, and at most one harmonic element. If an element is not in the core, it is a guest, and guests do not get to show up in every section.
Bounce the core alone and loop it for a minute. You are listening for two things: whether the groove works without anything else, and whether it leaves space. A core that already sounds full leaves you nowhere to go in the hook, which is the trap most producers fall into.
Test the core the way the artist will test it. Play it loud, then play it quiet with someone talking over it, which simulates a vocal. If the artist has to fight the groove to fit words in, the groove is too busy.
Then trim it. Producers routinely keep four or five drum layers that all play the same role. Usually one or two of them carry the whole pattern. Muting the extras gives you headroom for the hook and makes the beat sound more expensive, not less.
3. Create a Clear Verse-and-Hook Structure
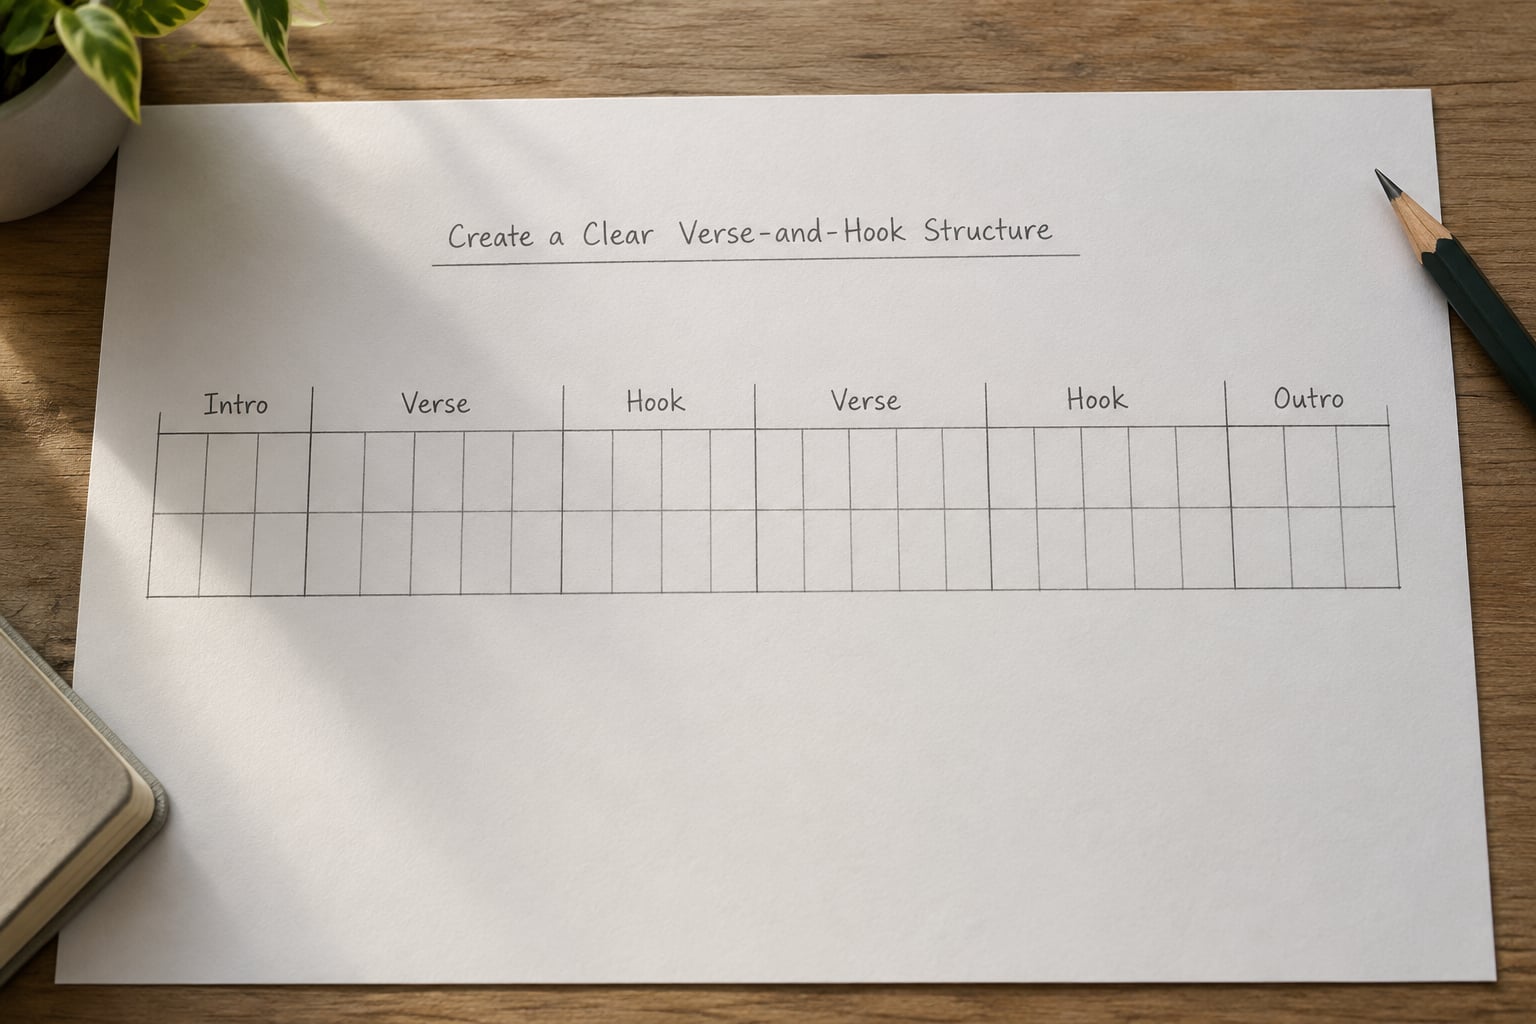
Repeat one recognizable musical idea and the song becomes memorable. Change its density or instrumentation and the song stops feeling static. Those two moves together are what structure actually is.
The working template most producers share looks like this, and it is the one artists expect:
- Intro — 4 bars
- Verse — 16 bars
- Hook — 8 bars
- Verse — 16 bars
- Hook — 8 bars
- Outro — 4 bars
That is 56 bars, which at a mid-tempo trap BPM of about 140 lands a shade over 90 seconds of arrangement before you repeat it. Double it with a bridge and a final hook and you are in a normal single length.
Hooks appearing after every verse, rather than one long second verse, is the piece beginners most often get wrong. Long second verses let the energy bleed out and give the artist no clear cue for where the memorable part starts.
Two placements worth knowing. Verse-first, where the hook lands around 24 seconds, suits records built to be listened to front to back. Hook-first, where the hook enters inside the first 10 seconds, suits records aimed at streaming, where the first few seconds decide whether someone presses through.
4. Use Contrast Between Sections
Contrast between sections, not the number of layers, is what makes an arrangement feel finished. Producers reach for contrast by adding. It mostly works by removing.
Here is a concrete pass. In the verse, mute one hi-hat layer, drop the bells out entirely, and keep the 808 with the sidechain pump. In the hook, bring the full drum pattern back in, add a supporting bass note an octave down, and bring the chords in with the reverb throw open.
You have now made the hook feel enormous without touching the overall loudness of the track. The verse is the same key, the same tempo, the same core groove, and it feels smaller on purpose.
A useful rule from working producers: change something every 4 to 8 bars. If eight bars pass with no change in density, register, or texture, attention drifts. That is the complaint you hear most from artists, that a beat feels amateur or generic, and it is usually an arrangement problem rather than a sound problem.
5. Leave Room for the Artist’s Vocal
This is the part that separates a beat made for an artist from a beat made to be posted on its own. The vocal has to land in a clear lane.
Vocals live mostly between 1 kHz and 4 kHz, and any melody or bright patch sitting in the same 2-5 kHz range will fight every word the artist sings. You can carve that space with a gentle EQ dip on the offending instrument, roughly 2 to 4 dB around 3 kHz, or by using a high-pass filter on a layer that does not need its lower mids.
Spatial spacing matters more than frequencies once the EQ is clean. A pad spread wide in stereo with the lead vocal centered leaves no conflict at all. Keep your bass, kick, and any wide melodic element to the sides and leave the middle for the voice.
Leave literal rests too. If your beat never pauses, the artist has nowhere to put emphasis, and emphasis is what makes a vocal sound confident. A bar of nothing before the hook gives them a place to land.
Test it by humming or speaking a rough line over the arrangement, including the pause at the end of a phrase. If you run out of room anywhere, thin out that bar. You can always add layers back later, but you cannot easily take away a crowded vocal space.
6. Add Movement Without Overloading the Track
Movement should point at something. A fill that leads into a hook works. A fill that leads nowhere becomes the focal point, and then the artist has to compete with your riser.
Drum fills are the cheapest tool. A four-bar fill of snare rolls or hi-hat triplets into the last bar before a hook costs you nothing and signals the change clearly. Keep it to one bar in most cases, two at most.
Transitions carry more weight when they do less. A reverse cymbal into the hook, a one-beat silence before the drop, a tape-stop pitch bend on the last word of a verse, or a snare roll that resolves on beat one all read as deliberate.
Risers and downlifters are fine, but treat them as punctuation. A riser that runs eight bars is a section, not a riser, and it will flatten the arrival it was meant to emphasise.
Melodic runs and counter-melodies deserve the same restraint. A short counter-line under the hook vocal can be the most memorable thing in a record, and it also can be the first thing the artist asks you to remove because it crosses their melody. Build it, listen for it, and be ready to pull it.
7. Shape the Intro, Outro, and Final Impact
The intro has one job: tell the listener the song is starting without wasting their patience. Four bars is the safe default. Anything past eight bars on a rap single is likely to be skipped.
Make the first four bars identifiable. Let the hook’s signature element appear once in the intro, or bring in the core groove with the drums filtered, so the hook arrival at bar 5 feels like recognition instead of a cold open.
The outro should end cleanly. A clean tail of a few seconds after the last hit is what stops a beat from feeling like it was cut off, and it is worth more on streaming than most producers realise because sudden silences get skipped.
For the final hook, change one thing. Add a layer that has not been there before, take the hook drums out for the first two bars and bring them back, or add a double-time hi-hat pattern. Repeat the section with more weight beats better than repeating it identically.
8. Export and Test the Artist-Ready Version
Run this list before anything leaves your computer. It takes five minutes and catches most of what embarrasses you later.
- Section markers named and in order: intro, verse, hook, verse, hook, outro
- No clipping at the loudest hook, with a couple dB of headroom left
- Fades on the intro and outro checked by ear, not assumed
- Tempo and key written down somewhere the artist will see them
- Vocal lane still clear when you play it with a voice over the top
- Checked on headphones, on a phone speaker, and at low volume
- Played next to two other tracks in the same lane to check it sits
- Every section transition played back-to-back without gaps or clicks
Export a tagless WAV for the artist, named with the key and BPM, plus grouped stems if you want them to record over it themselves. Then write four or five lines of session notes: the structure map, the tempo, the key, which sections are locked, and where you left space for their vocal. That note is the difference between a beat they record to and a beat they compliment and forget.
Common Mistakes
Too many layers. If the beat sounds full in the verse, the hook has nowhere to go. Fix: mute down to the core groove, then add back one element at a time until the hook feels wide.
Every section hits the same. Identical dynamics across 56 bars is the most common reason an arrangement feels generic. Fix: change something every 4 to 8 bars, and make at least one section deliberately emptier.
The melody masks the vocal. Bright leads and bells sitting in the 2-5 kHz range will eat words. Fix: carve the range with a narrow dip or filter, or move the element to a side.
Weak transitions. Sections butt into each other with no seam, so the song never announces a change. Fix: one bar of fill, a reverse cymbal, or a beat of silence before the hook.
An intro that runs too long. Four bars is enough to set the tone. Fix: cut the intro to 4 bars and start the arrangement sooner.
Mixing before the structure is right. Once you start balancing levels you start defending decisions you have not made yet. Fix: lock the section map and transitions first, mix last.
When a beat stalls, resist the urge to rebuild it. Pick the single weakest section, usually the second verse, and change one thing in it. Small targeted revisions finish tracks; total rewrites are how good loops get abandoned.
Frequently Asked Questions
How do you structure a beat?
Structure a beat by giving each section a bar count before you build anything: intro 4 bars, verse 16, hook 8, outro 4. Repeat the verse and hook, then vary the density between them so the hook feels wider. Keep the core groove playing in every section and treat everything else as something you add or remove at a section boundary.
How many bars should an intro be on a beat?
Four bars is the standard answer and it works almost everywhere. Eight bars is fine when the intro is doing something the song needs, like establishing atmosphere or introducing a signature hook element. Anything longer risks being skipped, especially on streaming, where listeners decide fast whether a track is worth staying on.
Should I put the hook first or start with a verse?
Both work, and they serve different goals. Verse-first, with the hook landing around 24 seconds, suits records people listen through. Hook-first, landing inside the first 10 seconds, suits records aimed at streaming play counts. A lot of producers now build hook-first and then treat what would have been the intro as a later section.
Can I arrange a beat around vocals I already have?
Yes, and it is often the fastest way to learn. Import the vocal, set the tempo to its bar length, and build the core groove around the phrasing. Where the vocal leaves space, that is where your hook goes. Many self-taught producers say arranging around an existing vocal made the structure obvious faster than any tutorial did.
How do you arrange a beat so a rapper can perform over it?
Strip the beat back until there is a clear pocket for the voice. Keep the kick, snare, and bass, thin out anything bright in the 2-5 kHz range, and leave short rests at the end of phrases so the rapper can land emphasis. Leave room in the midrange and a gap in the pattern, then check it by speaking a line over the top.
How do I know when a beat arrangement is finished?
A finished arrangement has a clear opening, at least one section that is emptier than the rest, transitions that announce changes, space for a vocal, and a clean ending. If a section does not change anything, cut it or vary it. Export it, listen the next day, and if nothing annoys you, send it with the tempo, key, and structure written down.
Conclusion
Start here: write the energy arc in one sentence, lock the core groove, then build the widest hook and strip it back for the verses. Everything else is detail on top of those three decisions.
When you learn how to arrange a beat for an artist, the goal is never more layers. It is contrast, space, and clean section transitions, plus notes that tell the artist where you left room for them.
And treat the first arrangement as a draft. The artist will record it, lean on four bars you thought were throwaway, and ask you to open up two others. Plan for that revision. It is not a failure of the arrangement, it is the arrangement doing its job.