To use a limiter without killing dynamics, set the ceiling first, keep the attack slow so transients survive the clamp, dial the threshold until the gain-reduction meter sits at roughly 1 to 3 dB, and treat anything past 6 dB of steady reduction as a signal to go fix the mix upstream instead. A limiter can only take level away from peaks. Loudness you get purely from gain reduction is loudness your track pays for in punch, and streaming normalization means you gain very little by pushing past it anyway.
That is the whole trick, and almost nobody hears it explained properly. Most people open a limiter, drag the output gain up until the numbers look respectable, and then wonder why their track sounds expensive and dead. The numbers look respectable because a limiter is very good at hitting a target. It is bad at leaving your music alone.
Here is the way I think about it: a limiter is the bouncer at the door of the master bus, not the road trip. It controls what happens when a peak tries to escape past your ceiling. Anything above that ceiling gets pulled back. Everything below the ceiling keeps its shape, which is exactly where your drums, your vocal consonants and your quiet breakdown live.
In this guide we will walk through the whole chain, step by step, then look at the mistakes that flatten mixes, and finally at the honest question of when you should not use a limiter at all.
What You Need
You do not need expensive gear. You need a chain you can hear and meters you can read. Here is the short list.
A finished mix with headroom. The signal arriving at your limiter should be well under 0 dBFS, ideally somewhere between -6 and -12 dBFS peak. If your mix is slamming into 0 dBFS before the limiter ever sees it, there is nothing left for the limiter to control, and it can only make things worse.
A limiter with real controls. Any compressor will do, but you want visible threshold, attack, release, ceiling and output gain dials, plus a gain-reduction meter. Most stock compressors in your DAW have all five. The plugin marketing term “transparent” is worth ignoring until you have used the thing a few times; every limiter colours something.
Three meters, not one. You want a gain-reduction meter, a true-peak meter, and a loudness meter reading integrated LUFS. The output peak meter alone will not tell you what you just did to your transients, and that is the number people watch when they should be watching the other two.
A reference track that you actually like, level-matched. Not louder, matched. Turn your master down until it sits at the same perceived loudness as the reference, then compare. This is the fastest diagnostic tool in audio and it costs nothing.
Two playback conditions. Check the track on your monitors at a moderate level, and check it on a phone speaker or a small Bluetooth speaker. If the low end disappears on the small speaker, your low end is not being limited correctly, no matter what the master bus meter says.
| Parameter | Start here | What it controls | Symptom of a wrong setting |
|---|---|---|---|
| Ceiling | -1.0 dBTP | The absolute peak the output is allowed to reach | Clipping and crunch after export if set at or above 0 |
| Threshold | Where 1 to 3 dB of gain reduction starts | How much of the waveform the limiter touches | Constant 6 dB or more of reduction, or no movement at all |
| Attack | Slow, roughly 1 to 5 ms on the master | Whether the initial transient gets through or gets clamped | Fast attack dulls the snare; no audible snap on hits |
| Release | Medium to slow, roughly 80 to 200 ms | How fast gain comes back between peaks | Fast release flattens the track, slow release audibly pumps |
| Ratio | 10:1 to infinity | How hard peaks are pulled toward the ceiling | Distortion and crackle when pushed very hard |
| True peak / oversampling | On, 4x where available | Catches peaks that hide between samples | Inter-sample clipping on phone and CD playback |
| Lookahead | 1 to 3 ms if your plugin has it | Lets the limiter see a peak before it arrives | Otherwise: transient distortion on every sharp hit |
Those numbers are starting points, not laws. A sparse ambient piece will barely move the meter and that is fine. A dense drum and bass master might justify 4 dB. The mistake is not the number, it is not knowing which number you are sitting at.
Step-by-Step: How to Use a Limiter Without Killing Dynamics
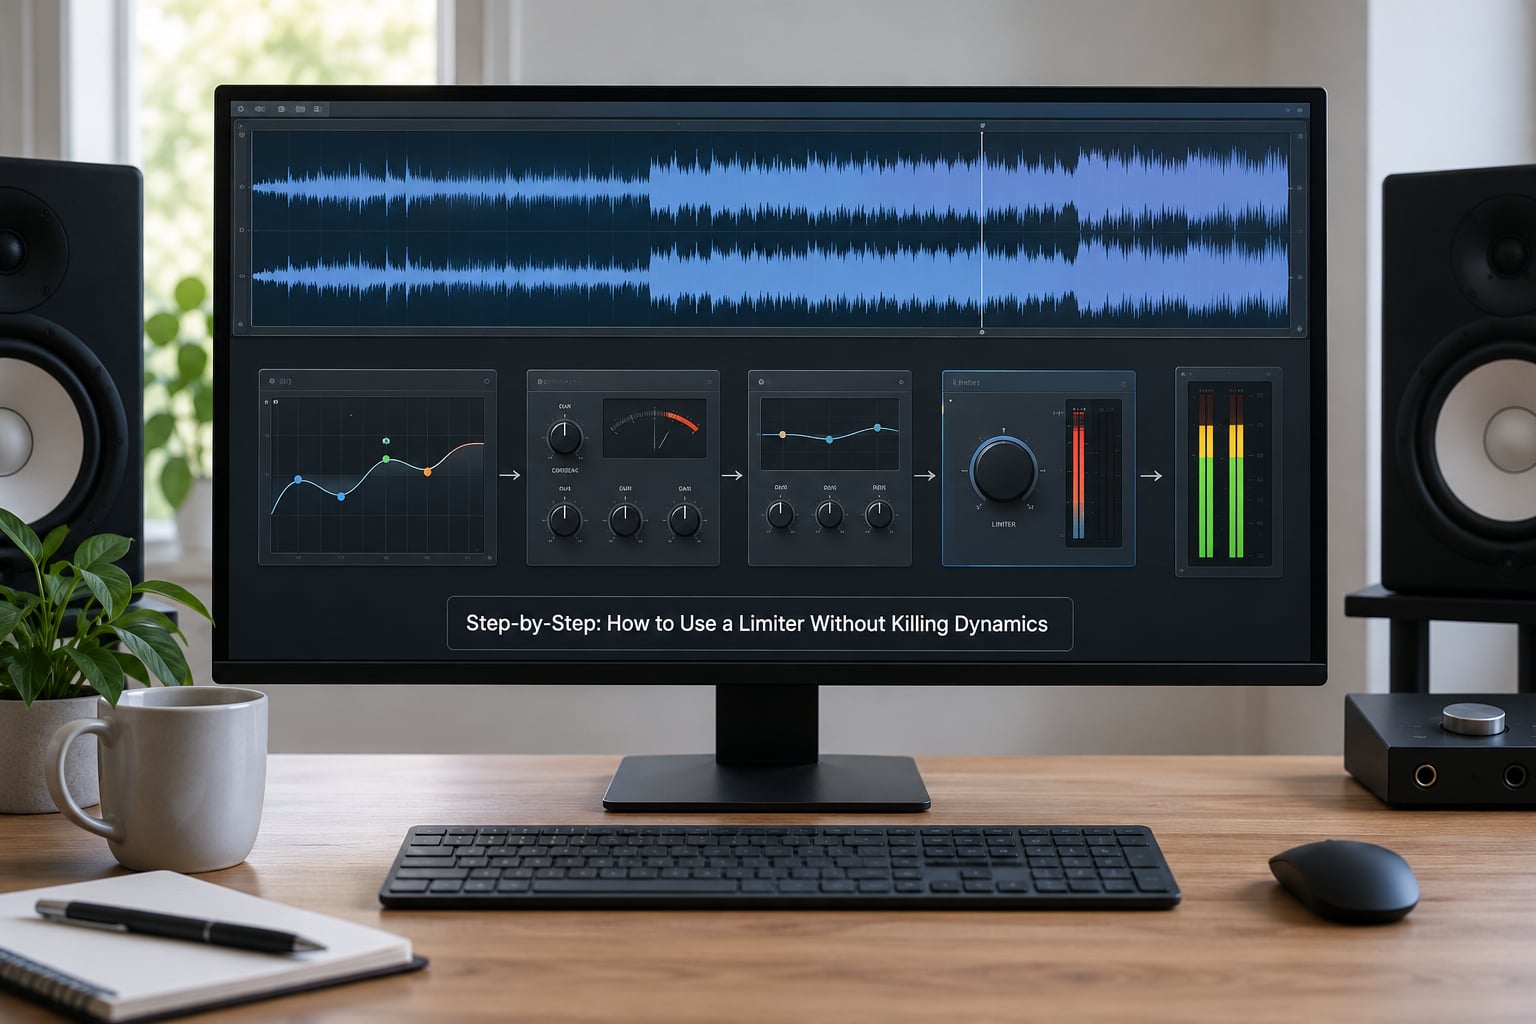
Step 1: Prepare the Mix Bus
Before you insert anything, pull your mix fader down until the loudest moment on the master bus is around -6 dBFS. That is the render level most engineers use, and it is a reasonable default for a full mix print.
To be clear about a persistent worry: rendering at -6 dBFS does not degrade the audio. A 32-bit float render carries the precision you need, and even a 24-bit render has plenty of room. You are not losing quality, you are creating headroom so the limiter has something to work with.
Now listen for one thing: distortion or clipping already present in the mix. If the mix is already breaking up because it was pushed too hot in the mix bus compressor, a limiter cannot repair that. It will just stack more reduction on top of a damaged signal. Fix the mix first, every time.
Step 2: Insert the Limiter on the Master Bus
Two placements, and they are not the same thing. Mix-bus limiting happens during mixing, on the bus where stems sum, usually with the limiter permanently in the chain so your whole mix session is monitored through it. Mastering limiting happens last, on a printed mix, usually in a fresh session with nothing else in the chain.
Mix-bus limiting is fine for mixing decisions, and plenty of engineers leave it in permanently so they are always hearing the final character. Just know that if you are mixing through a limiter, you are auditioning through it, and every loudness decision you make afterward is made inside that constraint.
Mastering limiting should be the last thing in the chain, after any EQ, saturation or multiband work you are doing. Whatever comes after the limiter, you cannot undo it.
Find the bypass button and use it constantly. The most useful comparison in mastering is the unprocessed mix against the limited mix, back to back, at matched level.
Step 3: Set the Output Ceiling
Set the ceiling before anything else, because it defines what “too loud” means for every other parameter.
Here is the distinction that trips people up. A sample-peak ceiling of -1 dBFS only guarantees that no individual sample goes above -1 dBFS. A true peak ceiling of -1 dBTP accounts for inter-sample peaks, the reconstructed values that appear when the signal passes through an analog stage or a DAC, which can sit above any sample in the file. Modern encoders and streaming platforms reconstruct those peaks, so a track that peaks at -1 dBFS by sample meter can still clip in playback.
Set your ceiling in dBTP with oversampling on, at 4x where the plugin offers it. Then a quick rundown of ceilings worth knowing:
-1.0 dBTP is the safe streaming default and works nearly everywhere. -1.5 dBTP is a slightly cautious choice that gives more margin on older consumer DACs. For club and festival systems built around very large headroom, engineers often work between -6 and -9 dBFS sample peak instead, because pushing to the digital ceiling there adds nothing the PA is not already providing.
Set it, then leave it alone. Changing the ceiling after you have dialled in the rest of the settings invalidates all of them.
Step 4: Set the Threshold and Amount of Gain Reduction
Here is the number that decides whether your master breathes. With attack and release roughly where you want them, bring the threshold down until the gain-reduction meter starts moving, then raise it slowly until you see a steady 1 to 3 dB of reduction on the loudest sections.
What you are looking for is the difference between momentary and steady reduction. Momentary 3 to 4 dB spikes on a snare hit are completely fine and are usually the limiter doing its job. A gain-reduction needle that sits at 6 dB and barely moves is a limiter acting as a compressor, and that is the sound people describe as flat, squashed or lifeless.
Think of it as a budget. Under 3 dB is transparent in almost any genre. Between 3 and 6 dB, listen carefully and A/B against the unprocessed mix. Past 6 dB of sustained reduction, the limiter is no longer the right tool; you need parallel compression, saturation, clipping or multiband work upstream to get the level you want without the cost.
Forum consensus on this point is pretty consistent. Regulars across audio engineering communities keep coming back to the same threshold: constant 3 to 6 dB of gain reduction is where masters start falling apart, and the fix is upstream work rather than a different limiter.
Step 5: Adjust Release for the Musical Material
Release is the parameter that decides whether you get punch or a pumping mess, and it is where most of the audible damage happens.
Think about what release physically means. The limiter clamps a peak, holds that reduced gain, and then has to give the gain back at some rate. If the release is fast, it gives gain back quickly, which means the sustained body of the note right after the transient gets pushed back up, which gets clamped again, which drops it again. You get gain riding rapidly up and down, and your ear reads that modulation as pumping or as a loss of body.
That is the mechanism behind the single most common limiter complaint in production forums: aggressive limiting makes a track feel loud but weak, physically smaller impact despite higher meters. It is not volume that makes impact. It is the contrast between the transient and everything after it, and fast release is what erases that contrast.
Fast release, roughly 10 to 50 ms, suits fast, dense material where you need to duck out of the way between closely spaced transients. It will flatten anything sustained.
Medium release, roughly 80 to 200 ms, is the sensible starting point for most full-mix mastering. It recovers between hits but still fills out sustained material.
Slow release, 300 ms and up, keeps pads, strings and reverbs intact but audibly pumps on sparse material with obvious gaps between events. If you hear the volume swelling in the quiet parts, you are too slow.
Attack deserves the same attention. On the master bus, a slow attack of roughly 1 to 5 ms lets the leading edge of a transient through and only pulls down what follows it. That single choice preserves most of your perceived punch. A very fast attack grabs the peak itself, and the transient is exactly what you were trying to keep. If your plugin has lookahead, 1 to 3 ms of it solves the same problem by letting the limiter see a peak before it arrives.
Step 6: Check the Mix in Context
Solo listening will lie to you. Human hearing adapts to whatever it hears first, which is why a loud master sounds quieter after five minutes of loud reference material.
Bypass the limiter and note how much louder the mix feels. If the unprocessed version is dramatically more present, you have flattened it. Then level-match properly: pull your master down until it sits at the same loudness as the reference, and switch between them without touching your monitor volume. Anything you hear at that point is real.
Play the reference afterwards. This sounds obvious and almost nobody does it. If your master is several decibels louder on meters but does not feel bigger, you are over-limiting.
Fold the master to mono and listen for any loss of width or any element disappearing. Then check it on a phone speaker. Bass that vanishes on a small speaker means the limiter is not doing its job properly, because small speakers have no headroom to spare.
Finally, walk away for ten minutes and come back. Ear fatigue is real, and mastering decisions made at minute forty of a session are rarely the decisions you would make at minute five.
Step 7: Export and Verify the Master
Export at 24-bit for delivery. Dithering to 16-bit is only necessary if a specific recipient genuinely requires it, and the noise shaping should be applied once, at the final export, never during the mastering chain.
After export, load the finished file back into your DAW and check three things: the true peak does not exceed your ceiling, the integrated loudness matches your target, and it sounds like the master you approved rather than something quieter or harsher.
That last listening pass catches real mistakes. Renders clip, plugins misbehave after a bypass, and the file you deliver should be the one you checked, not the one you assumed you saved.
Common Mistakes That Kill Dynamics
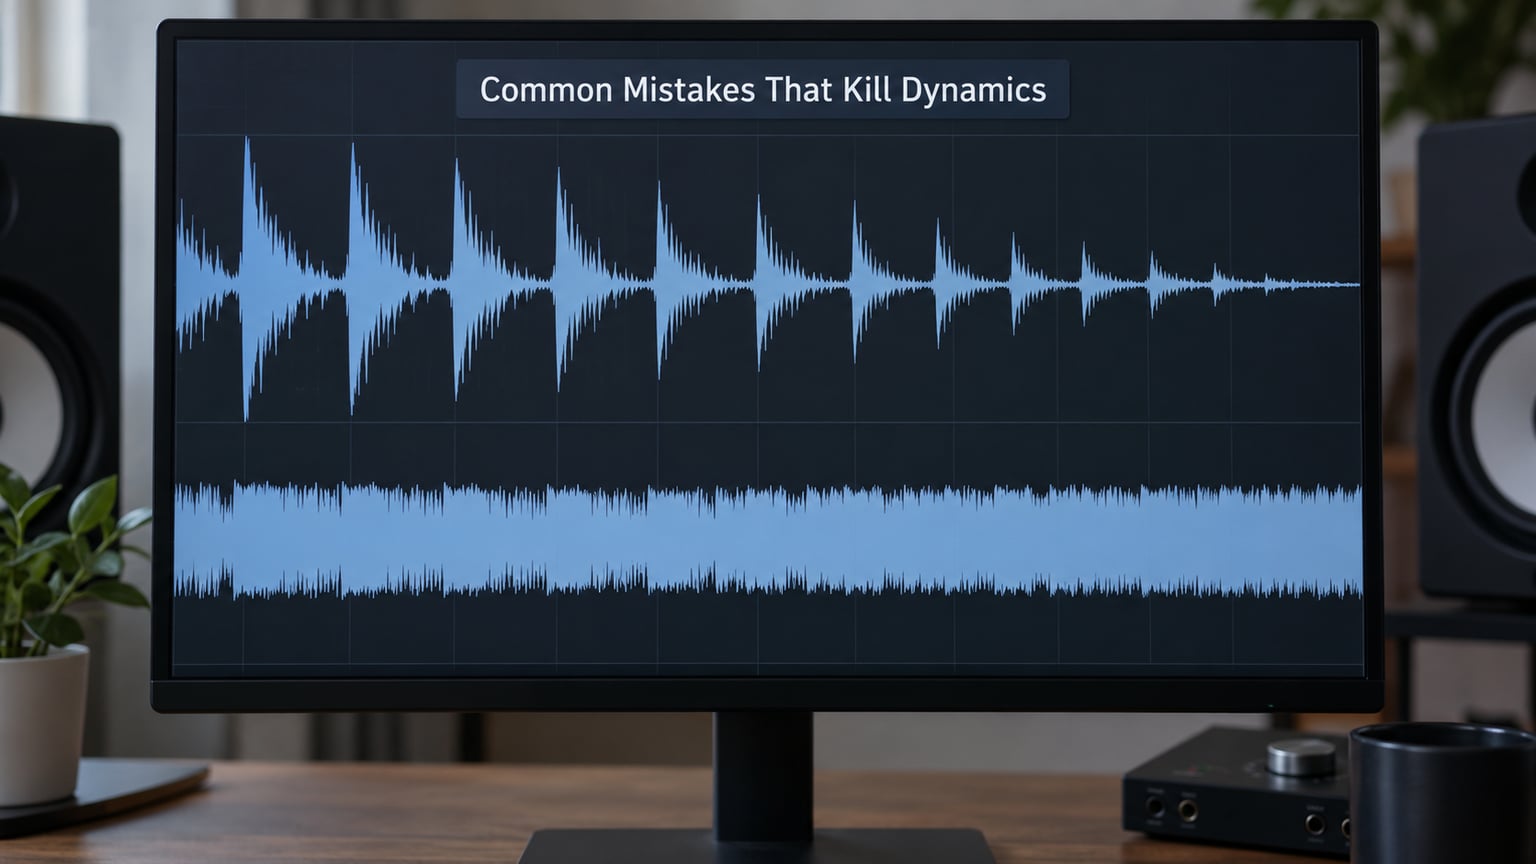
Almost every dead master traces back to one of six problems. Here is the symptom-to-cause mapping, because once you can name the cause you can stop guessing.
| Symptom | Likely cause | Fix |
|---|---|---|
| Loud but weak, small on phone speakers | 6 dB or more of sustained gain reduction, often with a fast release | Raise the threshold, slow the release, move the level-making work upstream |
| Snare and kick have lost their snap | Attack too fast on the master bus, catching the transient itself | Slow the attack to 1 to 5 ms or add 1 to 3 ms of lookahead |
| Audible pumping on sparse material | Release too slow for the arrangement | Shorten the release until quiet passages stop swelling |
| Distortion and crackle under heavy reduction | Ratio and release pushing the gain computer past its precision, or a hard-clipped mix arriving at the limiter | Reduce gain reduction, enable oversampling, fix the mix that is already clipping |
| Volume rides in the breakdown, everything pumping on the drop | Limiter left permanently engaged on the mix bus while you mix | Bypass it while mixing loud sections, engage it for the final check |
| Master sounds smaller than the reference at matched volume | Every bus in the session has its own limiter | Strip it back to one limiter on the master and nothing on the stems |
The most common mistake of all is putting a limiter on the drum bus. It sounds logical, the drum bus is the loudest thing in the mix, so why not. The answer is that a limiter clamps peaks and a drum bus needs dynamics to sound like drums. Engineers on home recording and GearSpace forums keep landing on the same advice: use a compressor on the drum bus to calm the range, and reserve the limiter for the very end of the chain.
The second most common mistake is confusing loudness with impact. They are related but not the same measurement. A master can measure 4 LU louder and feel no bigger, because the extra loudness came out of the crest factor, and crest factor is the gap between your peaks and your average level. Shrink that gap and the track loses the sense of impact that made you press play in the first place.
Forum threads about this topic get heated, and the loudest voices are worth taking seriously. The top-ranking discussion in this space argues that not using a limiter can sound better than using a bad one, and the technical logic holds up: every limiter is a very high-ratio compressor, and a compressor at an extreme ratio is not automatically transparent. The finish depends entirely on how you set it, not on the fact that you used one.
Tips for Keeping Punch and Impact
Everything here happens before the limiter. The order matters, because once the peak is clamped, it stays clamped.
Gain stage properly. If your mix bus is running hot, the limiter inherits a distorted signal. Pulling stems down before they sum gives the limiter a cleaner input and leaves headroom you did not know you were missing.
Use parallel compression for body. Send an auxiliary of your drum bus, crush it hard, and blend it back underneath the dry signal. You get density and apparent loudness with far less envelope modulation on the original transients, because the dry path never gets compressed.
Try light clipping or saturation before the limiter. A gentle clipper on the top end of the waveform, followed by an EQ pass to tame whatever harshness that created, can shave peaks into a shape the limiter barely has to touch. The word for this in electronic music is clip to zero, and the ordering matters: clipper first, filter or EQ second, limiter last.
Stack lighter stages instead of one heavy pass. Two limiters at 3 dB each do not sound like one limiter at 6 dB, because the gain reduction is applied in smaller, less continuous doses. Practitioners who advocate this are not being precious about it, they are simply reporting that the multi-stage version holds transients better.
Automate before you limit. If one section needs to be 2 dB louder than the rest, ride it in the mix. Gain automation preserves the exact dynamics you were worried about losing, and a limiter cannot give that back to you afterwards.
And know when to do less. Some masters are better with almost no limiting at all. If your reference match says you already sit at the right loudness before touching the plugin, that is a good result, not a failure.
On delivery, the targets worth knowing are straightforward. Streaming services normalize toward roughly -14 LUFS integrated, so a master at -14 LUFS integrated with a -1 dBTP ceiling arrives at the listener exactly as intended. Club and festival systems want somewhere between -6 and -9 LUFS, and pushing past about -4 LUFS typically adds meter readings rather than perceived size, because the PA is already supplying the physical energy the digital signal cannot. Rock and metal usually sit near -9 to -11 LUFS, hip-hop often runs hotter around -8 to -10 LUFS, and jazz and classical lose their identity entirely when pushed past about -16 LUFS. These are conventions, not rules, and the reference track always wins over any number on a chart.
Frequently Asked Questions
How much gain reduction is too much on a limiter?
Past about 6 dB of sustained gain reduction, a limiter stops being peak control and starts acting as a compressor, which is what produces the flat, lifeless sound people complain about. One to 3 dB of reduction on the loudest sections is transparent in almost any genre. Between 3 and 6 dB, level-match against a reference and listen carefully. Anything higher should be solved upstream with parallel compression, clipping or saturation.
Should I use a limiter on my master bus?
Yes, once, at the end of the chain. A limiter belongs on the master bus or in a final mastering chain, never on individual busses like drums or vocals. On a drum bus a compressor is the right tool, because drums need their dynamic range intact. If you are mixing through a limiter left permanently engaged, you are auditioning through it, so every loudness decision you make is already constrained by it.
What should my true peak be when mastering?
Set your ceiling in true peak terms at -1.0 dBTP with oversampling enabled, ideally at 4x where the plugin offers it. A sample-peak meter reading of -1 dBFS does not guarantee the same ceiling once playback systems reconstruct inter-sample peaks. Club and festival masters often sit lower, around -6 to -9 dBFS, because large PA systems have headroom that consumer playback does not.
Should I set my release time to 30 ms for a limiter on master?
Thirty milliseconds is fast for a master bus and it is a common cause of flattened tracks. Fast release gives gain back quickly after each peak, which pumps the sustained body of the note that follows a transient, and the ear hears that as loss of impact. Start around 80 to 200 ms for full-mix work, then shorten it if quiet passages swell audibly or lengthen it if dense drum material flattens.
Why does my master sound loud but weak?
Almost always crest factor collapse. The limiter pulled your peaks down toward the ceiling, so the gap between peaks and average level shrank, and impact lives in that gap. Test it by level-matching the master against a reference: if your master measures louder but does not feel bigger, you have over-limited. Fold to mono and check on a phone speaker too, because weak low end shows up there first.
Which type of limiter is best for mastering?
It depends on the job rather than the brand. A transparent brickwall limiter with true-peak detection is the safest default for streaming delivery. An analog-modelled limiter adds harmonic colour and behaves more like hardware, which some engineers prefer for cohesion but which colours the signal. A multiband limiter gives independent control across frequency bands, useful for modern dense mixes. Try each at matched settings before deciding, because identical gain-reduction readings do not mean identical sound.
Conclusion
Start here: pull your mix fader down until your loudest peak sits around -6 dBFS, drop a limiter on the master with a slow attack and a medium release, set the ceiling at -1 dBTP, then raise the threshold until you see a steady 1 to 3 dB of gain reduction on the loudest sections and no more.
Then bypass it and listen. If the unprocessed mix sounds noticeably more alive, the limiter is doing too much and you should take that level out of the mix bus, a parallel compression send or a clipper stage instead. If it sounds like the same track, you are done. The limiter should make a master more consistent and more competitive, not merely louder, and those are two different jobs.