
A vocal chain is the ordered set of processors a vocal passes through during mixing, usually a gate or expander, subtractive EQ, compressor, de-esser, additive EQ, optional saturation, then reverb and delay on sends. Order matters because each plugin reacts to the signal the one before it sends along, so the sequence decides whether your vocal ends up clean, harsh, or buried.
Most beginners lose an afternoon stacking plugins they can’t identify. This guide takes the guesswork out of it. In full: cleanup, corrective EQ, compression, de-essing, saturation, then time-based effects on sends, with automation last. You can build the whole thing with plugins already installed in your DAW.
Budget about an hour to set the chain up the first time, then a few minutes per song to dial it in. If you want to skip straight to a working chain, jump to the order at a glance.
What You Need
Almost nothing. That is the good news about vocal chains, and it is the part most tutorials leave out.
Required:
- A clean take. Recorded in a treated or at least soft room, with the mic roughly a hand’s width away and a pop filter between you and the capsule.
- An EQ and a compressor. Every DAW ships both, and they are the two plugins that do the actual work.
- A de-esser. Often bundled with your compressor or EQ, occasionally a separate stock utility.
- Headphones and the ability to check the vocal in mono.
Optional but useful:
- A noise gate or expander, if the room has steady air conditioning hum or you are recording near a computer fan.
- A saturation stage, tape, tube, or transformer flavour, for harmonic warmth on an otherwise clean digital vocal.
- Pitch correction such as Auto-Tune or Melodyne if you want tight tuning, and only if you want it.
- Automation lanes on the vocal track, which is where most of the real polish comes from.
A realistic minimum for a beginner is four stages: subtractive EQ, compression, de-essing, and reverb on a send. Add a fifth plugin only when you can hear a specific problem that one of those four cannot fix.
Step-by-Step: How to Set Up a Vocal Chain
The order below is the sequence to build, not just a list of plugins. Each stage assumes the previous one has already made the signal a little cleaner and a little more predictable, which is exactly why the sequence works.
1. Start with a clean vocal recording
Editing comes before any plugin because every processor you add will amplify whatever noise, rumble, and mouth clicks are already baked into the take. Cut the silence between phrases first, then align your best-sounding takes in layers, then tighten any consonants that hang past the intended word.
Set your input gain so the loudest syllable peaks around 12 dB below clipping. Do not ride the fader while recording; a compressor on the input would bake the dynamics in and leave you nothing to shape later.
2. Set Up the Signal Flow and Gain Staging
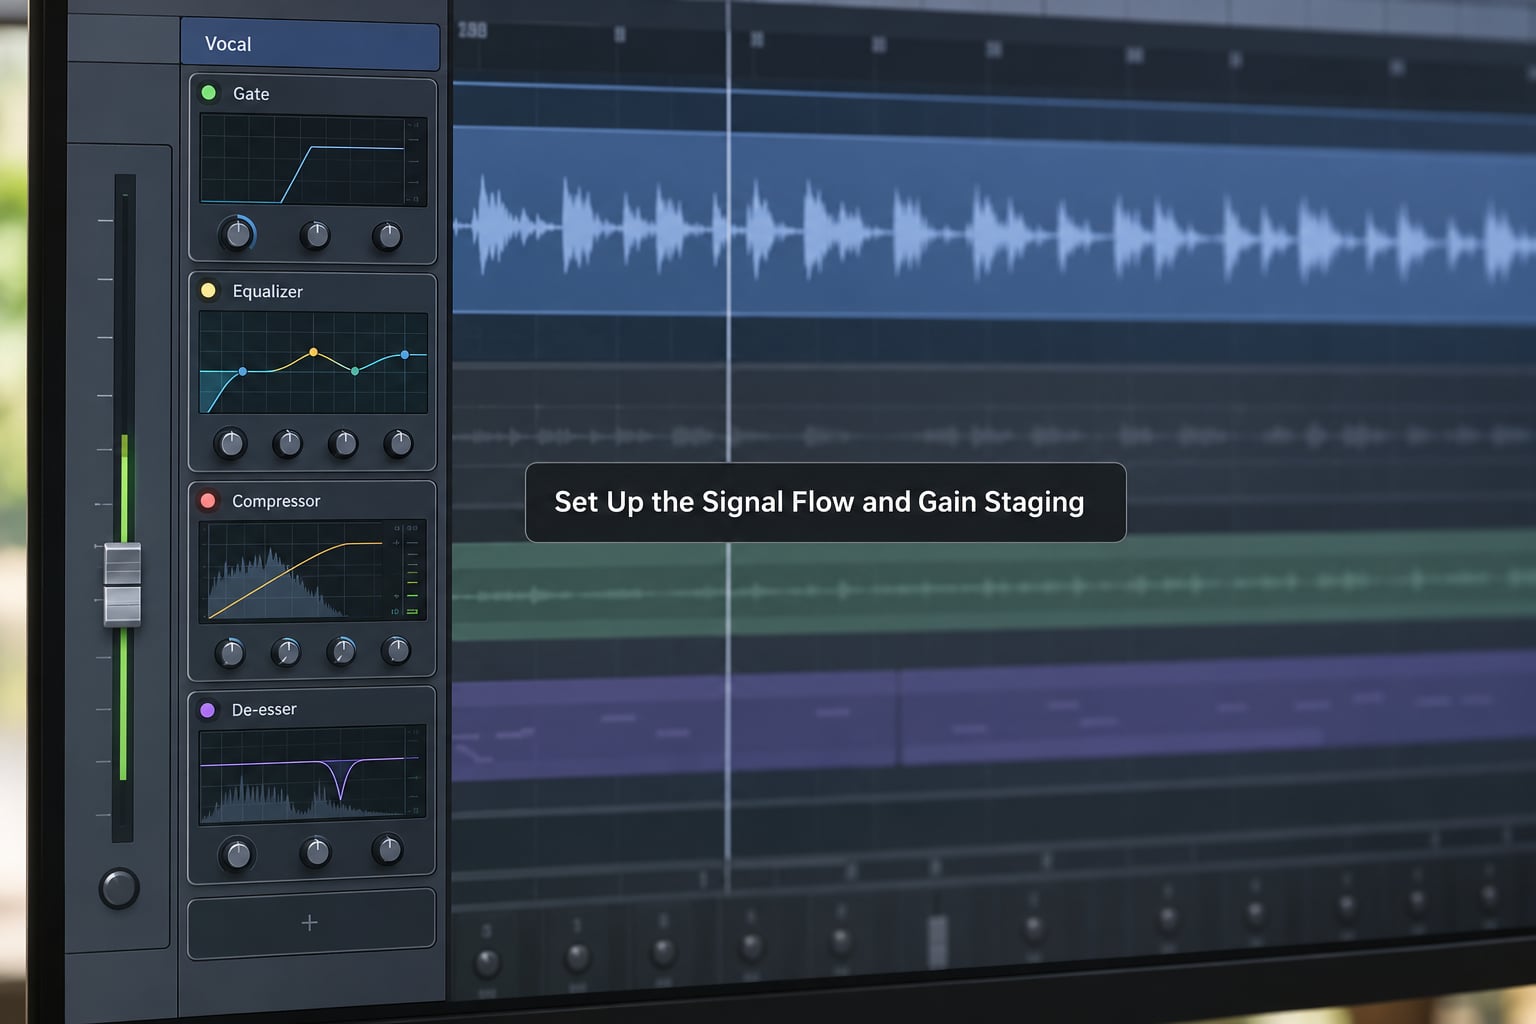
Arranging your inserts top to bottom is half the work, because the plugins communicate with each other. Use this order: cleanup, corrective EQ, compression, de-esser, optional pitch correction, additive EQ, saturation, then reverb and delay as sends rather than inserts.
Two rules cover most of the gain questions people ask. Each insert should output well below 0 dBFS, typically -6 dB or lower, so nothing downstream clips. And after every plugin that reduces level, add matching makeup gain so the chain stays level-matched and you are always comparing against the same loudness.
If a compressor is pumping, check the level going into it first. A signal arriving hot with a fast attack is the usual culprit, not the attack setting itself.
3. Apply corrective EQ
Corrective EQ removes problems. It is not the place to make a voice sound better, it is the place to stop it sounding worse. Start with a high-pass filter at 80 to 125 Hz for a male vocal and 150 to 175 Hz for a female vocal, set on a steep slope so you keep body without cutting the fundamental.
Then look for muddiness, usually a broad build between 200 and 400 Hz. Take 2 to 3 dB off with a wide Q value of 1 or so, and sweep slowly with the solo on. Any spot where the voice suddenly sounds boxy, nasal, or hollow is a resonance, and those want a narrower cut.
A useful discipline: subtractive moves first, with nothing else in the chain active. Solo the EQ, make the cuts, then bring the rest back in. If you cannot hear a problem, do not cut it.
4. Add compression for even vocal levels
The compressor’s job is to make quiet words and loud words sit closer together so automation takes less work. Watch the gain reduction meter rather than trusting your ears, because a compressed vocal sounds louder than it is even when it is not.
Start with a ratio of 3:1 to 6:1 and pull the threshold down until you see 3 to 6 dB of steady gain reduction on normal phrases. That range levels the vocal without flattening it. Set attack around 10 ms so the compressor reacts to sustained tone rather than every transient, and release between 80 and 120 ms so it recovers between phrases.
Add makeup gain to match the level you had before the compressor went in, then listen again. If you hear pumping, or the vocal suddenly feels lifeless and squeezed, the gain reduction is too deep. Half of it is usually fine.
5. Control sibilance with de-essing
Sibilance is the piercing burst on s, sh, ch, and t sounds, and it lives in the 5 to 9 kHz region depending on the singer. A de-esser is a compressor watching only that band, so it ducks the sibilant moments and leaves the rest of the vocal alone.
Place it after compression. Compressor makeup gain lifts whatever survived the squeeze, and surviving sibilance is exactly what gets lifted, so a de-esser set before the compressor tends to be undone by the stage behind it. This is the most repeated argument in mixing forums and the ordering has a mechanical reason behind it.
Set the detection frequency by ear, then reduce the amount until the s sounds sit with the rest of the word rather than in front of it. Two to four dB of reduction is usually plenty. If consonants start disappearing, you have gone too far, and that is easier to fix than the alternative.
6. Add color with saturation and time-based effects
Saturation is a light, deliberate addition of harmonics. On a clean digital recording it adds warmth and density that EQ cannot, and it should stay subtle. Mix it low, listen against the dry version, and pull it back any time the vocal starts sounding obviously driven.
Reverb and delay belong on sends, not inserts. An insert forces the entire vocal into the effect and washes it out, while a send lets you set the return level independently and keep the dry signal on top. Start with 10 to 20 ms of pre-delay so the vocal stays clear in front of the space, and try a delay timed to a quarter note of the song.
Doubler and chorus can sit before the reverb send, at low level, for width. Any of these can be left out entirely for a dry, intimate vocal, and plenty of records sound better that way.
7. Automate levels and check the vocal in context

Compression evens things out, but it cannot follow a song. Draw gain automation so louder lines and held notes sit where you want them, riding peaks and breaths with clip gain rather than the fader so the rest of the track stays untouched.
Then check the work three ways: solo, in mono, and under the full mix. Mono reveals smearing and phase problems that stereo hides. Playing the instrumental alone makes it obvious whether the vocal sits in front or behind. If it disappears in the full mix, the fix is usually a 2 to 3 dB presence lift around 3 to 5 kHz, not more compression.
Common Mistakes
Nearly every muddy vocal I have had to untangle came down to one of these.
- Compressing before high-passing. The compressor reacts to the rumble it should never have seen. Fix: high-pass first, then compress, and re-check the gain reduction.
- De-essing before compression. Makeup gain undoes it. Fix: move the de-esser one slot down.
- Stacking plugins to fix a problem you have not identified. Six processors is harder to diagnose than three. Fix: bypass one at a time and listen to what changes.
- Over-compressing. Ten dB of gain reduction on every word sounds consistent and lifeless. Fix: aim for 3 to 6 dB and add automation instead.
- Boosting the highs to cure mud. Turning up 10 to 15 kHz for air over a muddy vocal just makes the mud louder. Fix: cut the low mids first, then add air.
- Reverb and delay on inserts. The vocal disappears into the effect. Fix: move them to sends and set the return to taste.
- Ignoring the recording. No chain rescues a take with clipped peaks, heavy room reflection, or a mic against a grille. Fix: solve it at the source.
For a beginner’s first four plugins, use these: subtractive EQ, one compressor, one de-esser, one reverb send. Get comfortable with those before adding anything else.
Frequently Asked Questions
Do I need a vocal chain to make good recordings?
A chain is not a piece of gear you buy, it is a set of processors you arrange on one track. A basic version of four stages, subtractive EQ, compression, de-essing and a reverb send, uses plugins already in your DAW. You can get a usable vocal with those alone and add stages later when a specific problem calls for one.
What is the correct order for a vocal chain?
Cleanup first, then corrective or subtractive EQ, then compression, then de-essing, then additive EQ, then saturation if you want it, with reverb and delay placed on sends at the end. Pitch correction usually sits before compression. The order matters because each plugin reacts to what the previous stage sends it.
How do I set compression for vocals?
Set the ratio between 3:1 and 6:1, then lower the threshold until the gain reduction meter shows 3 to 6 dB on normal phrases. Start with an attack near 10 ms and a release between 80 and 120 ms, then add makeup gain to match the level you had going in. Listen for pumping or a flattened vocal as signs you have gone too deep.
Should I use an EQ before or after compression?
Use one on both sides, doing different jobs. Before compression, use subtractive EQ to clear rumble, mud and resonances so the compressor reacts to a cleaner signal. After compression, use additive EQ for presence and air. Skipping the first step is what makes a compressor pump on plosives.
Can I set up a vocal chain in any DAW?
Yes, as long as your DAW offers an EQ, a compressor and a de-esser or dynamic EQ, which nearly all of them do. The insert slots are usually called inserts, FX, or plugins depending on the host. Save the finished setup as a track preset or channel template so you can load it on every new vocal.
When should I use de-essing on a vocal?
Use it whenever s, sh, ch, or t sounds stick out and get sharper as the vocal gets louder, which is most contemporary vocal production. Set the detection frequency between 5 and 9 kHz by ear and aim for 2 to 4 dB of reduction. Place it after compression, since makeup gain lifts any sibilance that survived.
Conclusion
Start with the recording, then run the order in one pass: cleanup, subtractive EQ, compression at 3 to 6 dB of gain reduction, de-essing after the compressor, additive EQ for presence, and reverb and delay on sends.
Keep every move small and check the vocal in mono and against the instrumental before you add anything new. When something sounds wrong, bypass a plugin instead of reaching for another one.
Save the finished chain as a preset and you have a starting point for every track from here.