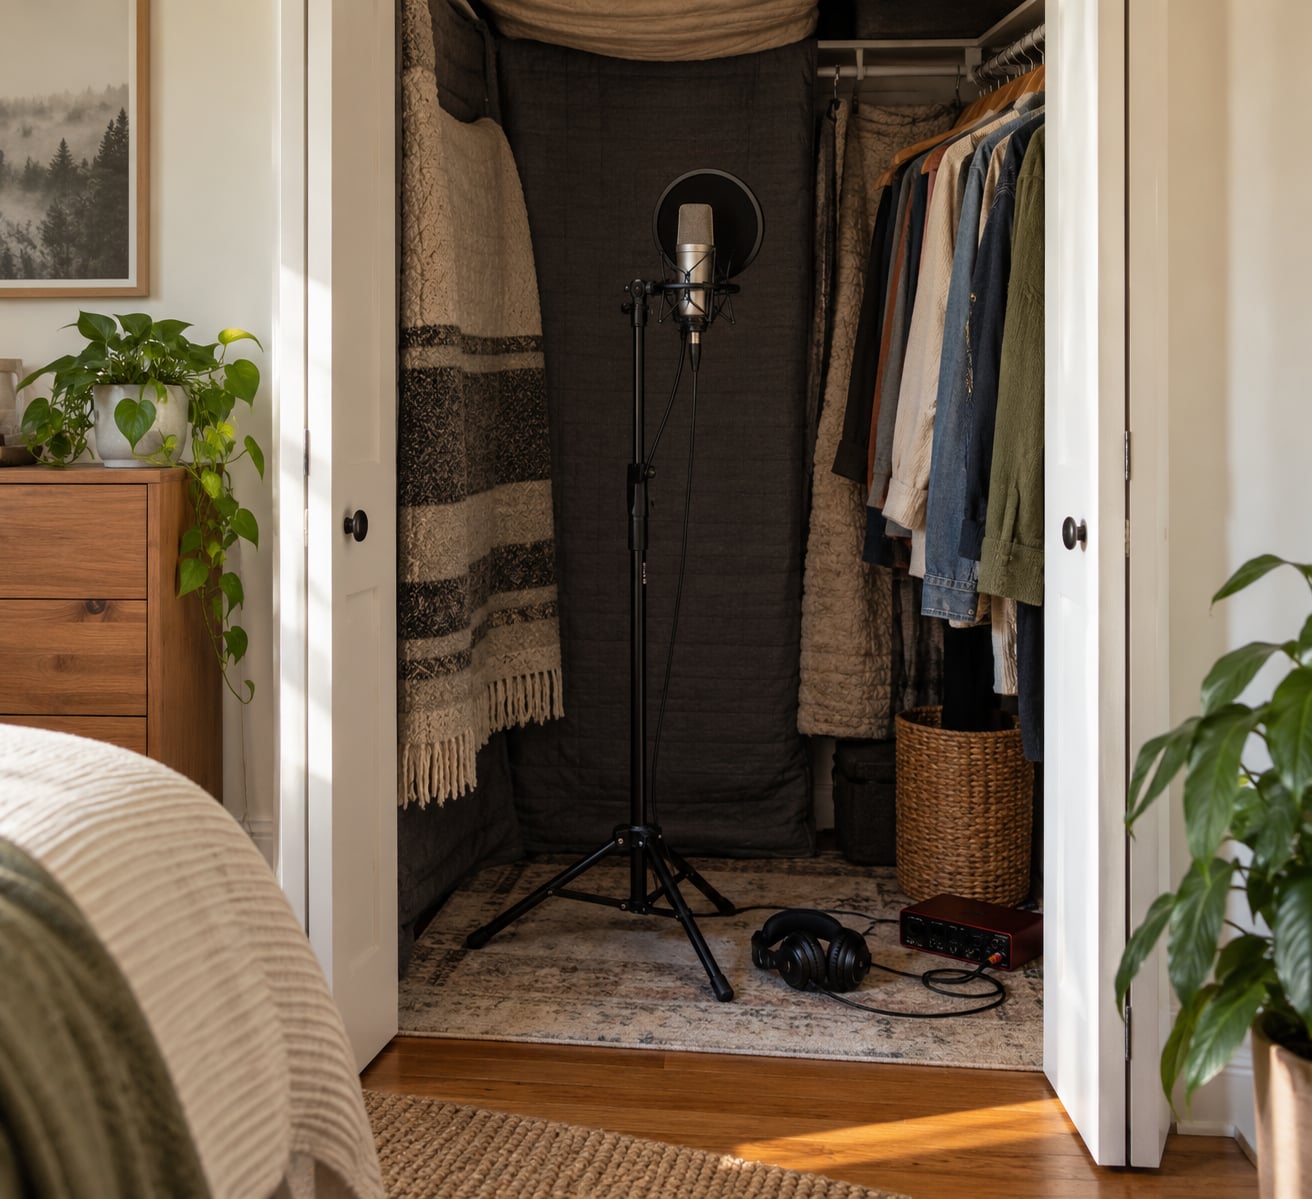
Learning how to record vocals in a closet comes down to three things: killing the reflections off those parallel walls, catching the low-end buildup in the corners, and putting the microphone close enough to your mouth that the room barely enters the recording. Done properly, a walk-in closet gives you an isolated booth with a tight, dry vocal that sits well in a mix. Expect a two-hour setup the first time, then about twenty minutes for every session after that.
The honest part is that a closet does not sound like a studio. It sounds like a small, damped room, and every take carries a little of that. Once you know which frequencies cause it, you can fix most of it with blankets, a couple of panels and a smarter EQ, and you will never hear the difference in a finished track anyway.
Table of Contents
- What You Need
- Step-by-Step
- Common Mistakes
- Frequently Asked Questions
- Is a closet actually good for recording vocals?
- How small does the closet need to be, or how big?
- Are blankets enough, or do I need acoustic foam panels?
- Should I use a condenser or a dynamic microphone in a closet?
- Do I need to soundproof the closet, or is treatment enough?
- Should I record in mono or stereo?
- Conclusion
What You Need
Most of this list is cheap and already in the house. The only real decision is the microphone, and even that has an easy default answer.
- A microphone. For singing, a large-diaphragm condenser gives you the detail and air that make a vocal sit forward in a mix. A cardioid dynamic like an SM58 is the other good option and it tolerates a messy room noticeably better.
- Headphones. Closed-back only. Open-back headphones leak sound into the recording and you will hear yourself in the take.
- An audio interface with a preamp, or a USB microphone if you are starting from nothing.
- Recording software on the computer. Audacity, Reaper, Logic and GarageBand all do the job.
- A mic stand and a pop filter. The filter matters more than most beginners expect.
- Thick moving blankets or comforters for the walls, and something stiff in the back corners. This is the part people skip and then wonder why the take sounds boxy.
Optional upgrades, in the order they actually help: a reflection filter on the back side of the mic, a second blanket layer, a small sub bass trap for each rear corner, and eventually a proper 4-inch broadband panel. Nobody needs all four before the first take.
Step-by-Step
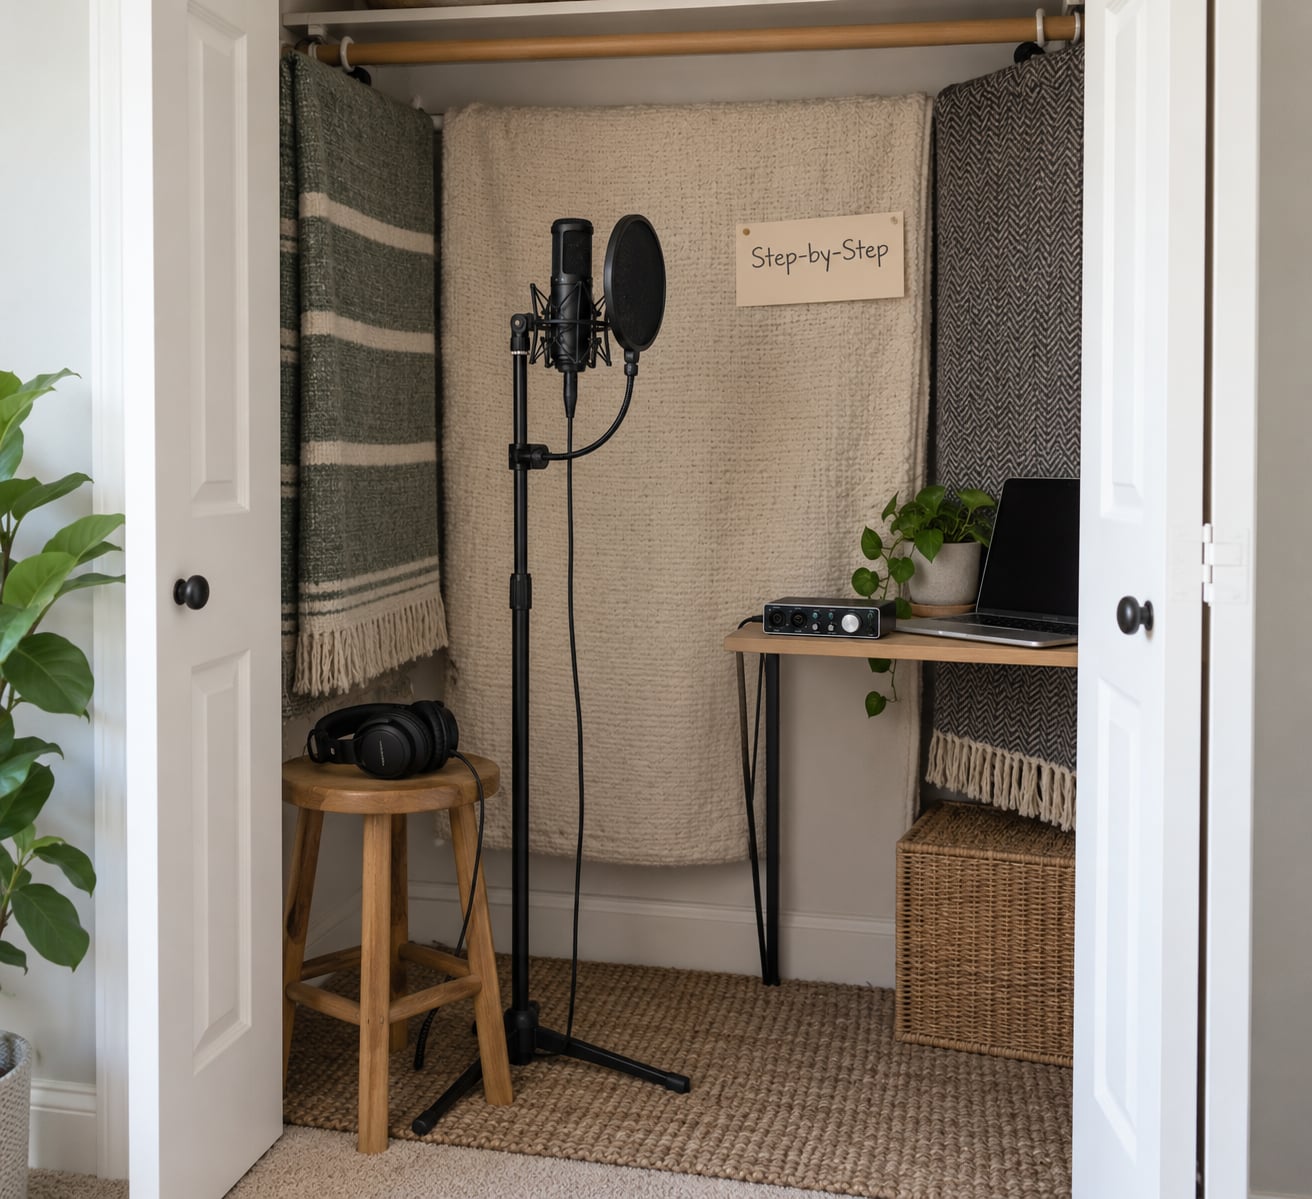
Prepare the Closet for Recording
A closet is a strange room, and understanding why explains every tip that follows. You have four flat surfaces a short distance apart, which produces standing waves at predictable low frequencies, and the parallel side walls create a flutter echo that smears consonants.
The clothes already hanging there are doing useful work. Fabrics absorb reflections in the mid and high range, which is exactly what makes a vocal sound crisp rather than smeared. What they cannot do is absorb the bass, because low frequencies are too large and slow to be stopped by soft material.
Start here, in order:
- Use the biggest closet you have. A walk-in of roughly 4 by 4 feet is about the practical minimum for singing. A reach-in closet with the door open is workable for voiceover with heavy treatment, and genuinely uncomfortable to sing in.
- Clear the floor. Shoes, baskets and loose hangers rattle if you bump them. Leave a path in and a door that shuts.
- Hang thick blankets on the back wall and the door. Push them a few inches off the surface so there is an air gap. A blanket pressed flat against drywall absorbs very little.
- Fill the rear corners. Two triangular or cylindrical bass traps, or a rolled blanket wedged vertically in each corner, are what control the low-end buildup. Corner treatment does more than any amount of flat wall covering.
- Cover roughly 70 percent of the surface, not 100. Fully dead surfaces make the vocal sound lifeless and can make singers panic. Community consensus among home recordists lands around 70 percent coverage as the sweet spot between boxy and dead.
- Keep the clothes. Do not empty the closet in pursuit of an empty room. The clothing is free absorption you already own.
You will not fully soundproof a closet and you are not trying to. Gaps around the door and any window let noise in and out, which matters if the microphone is picking up a fridge hum or a passing car. Isolation is a bonus of the closet; the treatment is what makes the recording sound good.
Position the Microphone and Singer
Distance beats gear. A condenser microphone held 12 inches from your mouth in a bare closet will capture the room. The same microphone 4 to 6 inches away barely hears the walls.
Set up like this:
- Stand in the closet first, before you set the mic. Find the spot where your voice sounds most natural when you sing a few lines out loud. Mark it on the floor with tape so every future take lands in the same place.
- Aim the back of the microphone at the emptiest part of the closet. The back is the least sensitive side of a cardioid mic, so it rejects the wall behind it. This off-axis placement also softens proximity effect, the bass boost you get up close.
- Keep your mouth 4 to 6 inches from the pop filter. Thinner pop filters can work from 8 inches. The filter sits between your mouth and the microphone, never behind it.
- Leave a gap between your head and the back wall. Three or four inches of dead space removes the closest reflection, which is the one your ear hears most clearly.
- Sing slightly off-axis. Turn your head a few degrees past the microphone rather than straight into it. It takes a minute to get used to and it takes the edge off plosives and sibilance.
- Wear closed-back headphones the entire time. They are for isolation and monitoring, not for tracking off the speakers. Mixing through the closet speakers is a losing game.
If your voice still sounds thin after moving things around, put a thick blanket over your shoulders. It kills the reflection off your chest and costs nothing. A reflection filter behind the mic does the same job on the opposite side.
Set Levels and Record a Test
Gain staging is simple: get the loudest, quietest part of your performance into the software with plenty of room left, and never let the level touch the top.
- Start with every gain at zero. Interface preamp, software input gain, nothing boosted.
- Sing your loudest passage. Raise the preamp until peaks sit somewhere between 6 and 12 dB below the digital ceiling. That is your headroom.
- Check you are not clipping. In the software, a waveform that touches or flattens against the top of the meter means it is clipping. Lower the gain and take it again. A clipped vocal cannot be repaired later.
- Set a high-pass filter at 80 to 100 Hz. This removes rumble from footsteps, HVAC and handling noise without touching the fundamental of your voice. Recordists doing voiceover in closets report that rolling off everything under 100 Hz alone noticeably improves the timbre.
- Record 20 seconds of talking, then 20 seconds of singing. Speak at your normal volume, then sing at your loudest and softest.
Playback the test on headphones. Listen for hum that pulses, a hollow nasal tone around the 200 to 400 Hz range, and any rattle when you move. Most beginner problems show up here, before you have wasted an hour on takes.
Record and Review Your Vocals
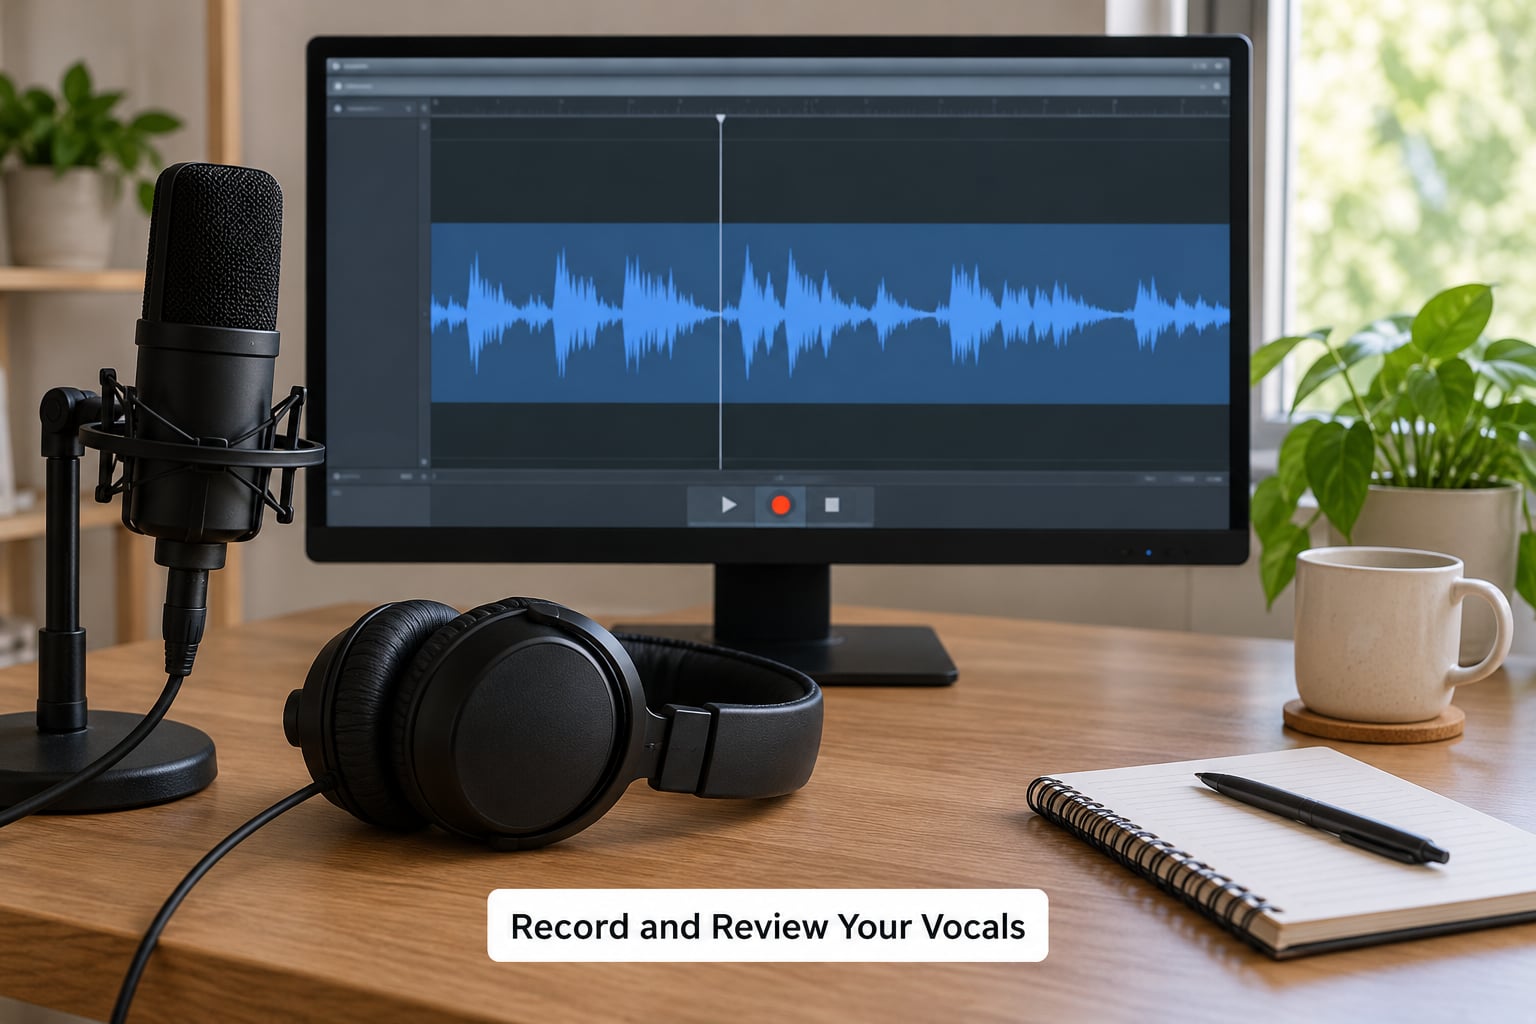
Now that the room and levels are right, the recording part is almost boring. That is the goal.
- Keep the setup fixed. Same mic position, same distance, same gain for every take. Any change makes the takes unusable for editing together.
- Record five to eight takes. More than that and you start chasing perfection on a tired voice.
- Name files as you go. Take_01.wav, Take_02.wav. Thirty takes named final_final2 is a mess you will resent later.
- Rest between takes. Sing a scale, sip water, breathe. Tired vocals get thin and pitchy in a small space fast.
- Do not leave the mic running while you drink coffee. Long gaps are noise you will have to edit out.
Review the takes on headphones, at a normal level, before you touch any plugin. Listen for four things:
- Noise. Any hiss, hum or traffic that was not there when you played by ear.
- Balance. If some takes are louder or darker than others, do not reach for compression. It is a gain problem first, so fix the singer distance before you reach for a plugin.
- Timing. Listen without the instrumental and nod along. Rushed or dragged notes are fixed with comping, not EQ.
- Performance. Pick the take where the emotion landed, even if a stray note is imperfect.
Then edit the boxiness, if any is left. A gentle EQ sweep on the vocal does most of the work: a high-pass already applied, a wide cut between 200 and 400 Hz to thin out the mud, and a small boost around 3 to 5 kHz to bring consonants forward. Take the cut in small steps and listen with the music playing, because a vocal that sounds clear alone often disappears in the mix.
Common Mistakes
Almost every disappointing closet recording comes from one of these.
- Treating only the walls. Flat panels hung on flat drywall do nothing for the corners where low frequencies pile up. Fix: traps or rolled blankets in the rear corners first, always.
- Pushing blankets flat against the surface. Compressed fabric loses most of its absorbing ability. Fix: leave a 2 to 4 inch air gap behind everything you hang.
- Standing too far from the microphone. Distance mixes in the room. Fix: 4 to 6 inches from the pop filter, no exceptions.
- Recording straight into the wall behind the mic. Fix: point the rear of the microphone at the emptiest surface in the closet.
- No pop filter. A cheap filter removes the burst from every P and B. Fix: buy one, always sing past it, never directly behind it.
- Boosting presence to fix sibilance. High frequencies are already lively in a small treated space. Fix: fix the placement and singing angle first, then EQ.
- Setting gain too high. Fix: peaks 6 to 12 dB under the ceiling, checked on the loudest line of the song.
- Changing the setup between takes. Fix: decide the position once, tape it down, and leave it alone.
- Treating the closet too completely. A dead room is not a clean room. Fix: stop at about 70 percent coverage and leave the clothes hanging.
- Recording with a noisy room and trying to fix it later. Noise reduction plugins cannot rebuild a vocal that was buried in room tone. Fix: close the door, unplug the fridge if practical, and record during quiet hours.
One more habit worth keeping: record 30 seconds of silence at the start of each session. That room tone sample is what makes noise reduction in editing behave predictably.
Frequently Asked Questions
Is a closet actually good for recording vocals?
Yes, for a home recordist it is one of the better options available. A closet isolates your voice from the rest of the house and the hanging clothes absorb mid and high reflections. The trade-off is low-end buildup from the parallel walls, which you control with corner traps and a high-pass filter. It will not match a commercial booth, but it is closer than an untreated bedroom.
How small does the closet need to be, or how big?
Bigger is better, and roughly 4 by 4 feet is the practical minimum for singing in a walk-in closet. A reach-in closet with the door pulled shut can work for voiceover if it is well treated, but singers usually find it cramped and suffocating. If you have a choice between a small closet and a large walk-in, take the walk-in every time.
Are blankets enough, or do I need acoustic foam panels?
For most home vocal work, heavy blankets and moving blankets on the walls, plus something in the corners, are genuinely enough. Soft material absorbs mid and high frequencies well, and those are the frequencies that make consonants smear. Foam panels are denser and work at lower frequencies, so they help, but they are an upgrade rather than a requirement. Buy panels when the blankets stop being enough.
Should I use a condenser or a dynamic microphone in a closet?
A large-diaphragm condenser is the usual choice for singing because it captures detail and air. It also picks up room sound and plosives more readily, so it demands the close placement described above. A cardioid dynamic such as an SM58 rejects the room better and is more forgiving in an untreated space. Beginners with a messy closet often get better results from the dynamic.
Do I need to soundproof the closet, or is treatment enough?
Treatment and soundproofing are different jobs. Treatment controls what the microphone hears inside the room. Soundproofing stops noise entering or leaving, which mostly affects neighbours rather than your recording. Lightweight or glass-front closets leak more noise, so record during quiet hours, close the door and seal obvious gaps. Full soundproofing is a construction project and not worth it for vocals.
Should I record in mono or stereo?
Record vocals in mono. Almost every mixing workflow places a lead vocal dead center in the image, and a mono take is easier to edit, comp and tune. Reserve stereo for room recordings, ensembles and anything where width matters. Spending your effort on placement and treatment will improve the take far more than the track format will.
Conclusion
Start with the five things that matter, in this order. Fill the rear corners so the bass stops piling up. Hang thick blankets with an air gap behind them, and cover about 70 percent of the surfaces. Keep your clothes where they are. Then mark your spot, stand 4 to 6 inches from a pop filter, point the back of the microphone at the emptiest wall and sing slightly off-axis.
Set your gain with peaks 6 to 12 dB below the ceiling, add a high-pass filter at 80 to 100 Hz, and record a 20-second test. Whatever that test reveals, fix it before you record a full take, because knowing how to record vocals in a closet is mostly a matter of fixing one variable at a time and hearing the result.