If you want to know how to position studio monitors for accuracy, the short version is this: put the speakers at the ends of an equilateral triangle with your chair, set the tweeters at your seated ear height, angle each one inward about 30 degrees, and pull them off the side walls as far as your desk allows. Get those four things right and most of what people blame on their monitors or their interface actually goes away.
The part nobody tells you is that placement is the cheapest correction you will ever make. Moving a speaker six inches changes the low end at your ears more than most EQ plugins do, and it costs nothing. Room correction software gets the credit, but it is really just trying to repair geometry you could have fixed with a tape measure.
Budget about an hour for the first pass. You will re-measure twice, because the numbers usually look worse on paper than they sound in the room, and that is normal. In 2026 I still go back and nudge things after a few weeks of mixing.
Table of Contents
- What You Need
- Step-by-Step: How to Position Studio Monitors for Accuracy
- 1. Place the Speakers at the Ends of the Listening Triangle
- 2. Set the Speaker Distance and Listening Distance
- 3. Angle the Speakers Toward the Listening Position
- 4. Align Tweeter Height With Ear Level
- 5. Control Nearby Reflections and Speaker Vibration
- 6. Verify the Setup With Measurements and Familiar Music
- Common Mistakes
- Frequently Asked Questions
- How far apart should studio monitors be?
- Should studio monitors be placed close to a wall?
- Do studio monitors need to be at ear level?
- What is the best speaker-to-listener distance?
- Should I use isolation pads between studio monitors and the desk?
- Can room correction software replace proper monitor placement?
- Conclusion
What You Need
None of this is expensive, and most of it is stuff you already own.
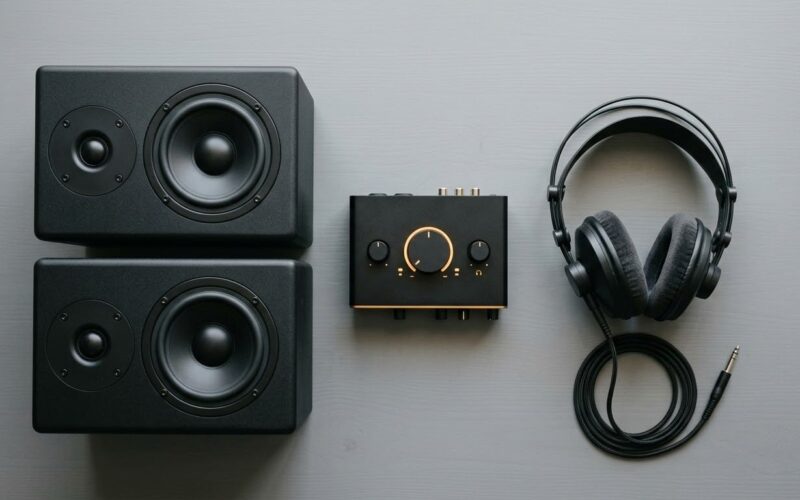
- A matched pair of monitors. Mixing on one speaker plus a headphone check is not a substitute, because you lose the phantom center you will spend the rest of this article trying to verify.
- Isolation. Foam pads, closed-cell foam, or a proper stand. Anything that stops the cabinet from shaking the desk is enough.
- A tape measure. A five dollar one. You will use it more than you expect.
- A hand mirror. For finding the first reflection points. This is the cheapest tool in the whole workflow and it works.
- A fixed listening position. A chair at a fixed spot. Not the couch, not the bed. The same seat, every mix.
- A measurement option. Room EQ Wizard with a measurement microphone is free and is the tool the regulars on r/audioengineering and r/homestudios keep pointing at new producers. A decent dB meter app on your phone is enough to get a rough reference level if you are not ready to buy a mic.
- Two or three reference tracks that you know well, mixed by someone whose work you respect. Familiar music is the fastest way to hear what moved.
Also worth having: something to mark the floor. Painter’s tape at the base of each speaker and at the front of the chair turns your measurements into a repeatable setup instead of a memory you have to trust.
Step-by-Step: How to Position Studio Monitors for Accuracy
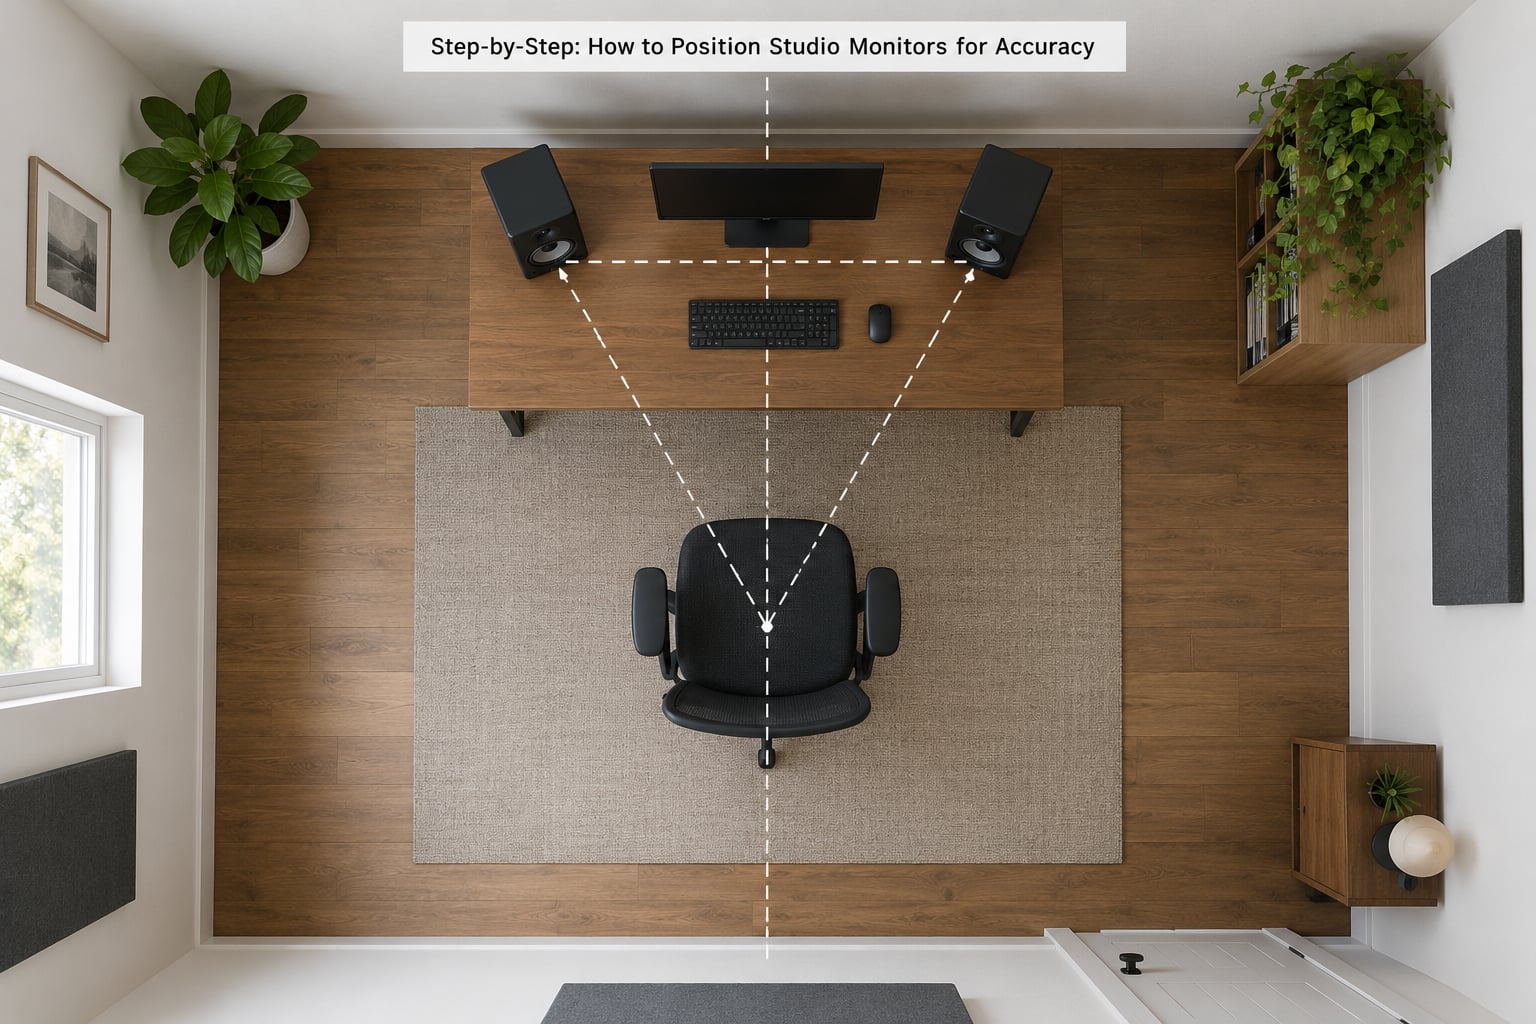
Work through these in order. Each step assumes the one before it is done, because they overlap. Height changes the geometry, geometry changes the reflection pattern, and the reflection pattern decides what the sweep test will show you.
1. Place the Speakers at the Ends of the Listening Triangle
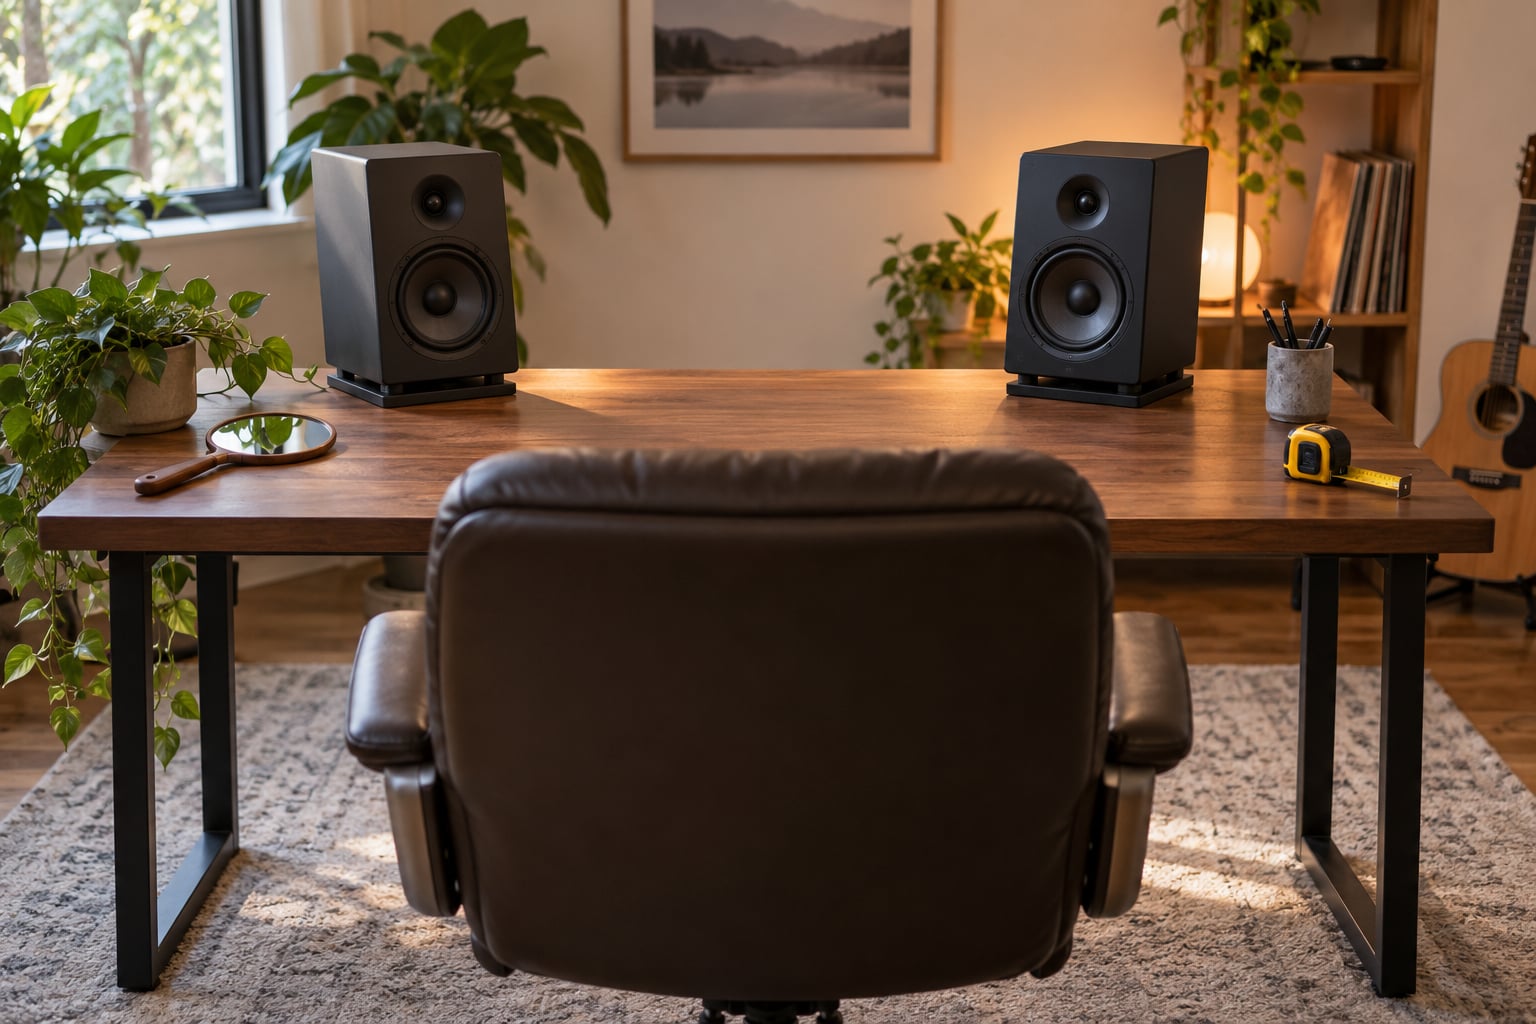
Learning how to position studio monitors for accuracy starts here, because everything after it depends on the geometry. The equilateral triangle rule says the distance between your two speakers should equal the distance from each speaker to your head, in all three directions. Every side of that triangle is the same length.
Set the chair first, at the position you will actually mix from. Then measure from the front of the chair to where the left speaker will sit, and from there to the right speaker. Adjust until all three measurements match within an inch or so.
Here is where I disagree slightly with the internet. Practitioners on GearSpace and in the audio subreddits almost never treat the triangle as law. It is a starting geometry that gets your distances roughly in the right neighborhood, and then measurement takes over. Treat it as step one of six, not step one of one.
One GearSpace thread puts the useful range at about 1 foot to 3 feet 3 inches from the speaker front face to the listening position, which is a wide window. Near-field monitors work across most of that range.
2. Set the Speaker Distance and Listening Distance
Near-field monitors are designed to be listened to from close in, usually 3 to 5 feet away. Farther out and you are listening to the room rather than the speakers. Closer than about 2 feet and you sit inside whatever bass buildup the room has.
The distance from the front wall is the number people get wrong most often. Moving a speaker away from the wall does not remove bass, it changes which frequencies pile up. Close to the wall and the buildup centers low. Pull the speaker out and that energy moves up in frequency, into the region where vocals live.
Common advice is 8 to 12 inches off the wall and away from corners. In a small room that is often impossible with a deep desk, and so be it. A speaker 4 inches off a wall is not ideal but it is dramatically better than one jammed in a corner.
Where you sit in the room matters as much as where the speakers are. Three ratios come up constantly, and they answer different questions.
| Ratio | Where the listening position sits | When it helps |
|---|---|---|
| 38 percent rule | 38 percent of the room depth measured from the front wall | Room speakers mounted near the front wall; tries to avoid the worst front-to-back mode |
| 3/8 rule | Three eighths of the way into the room | A common desk setup; essentially the same idea at a slightly deeper position |
| 83 percent rule | 83 percent of the way from the back wall, leaving a small gap behind your head | Keeps the listening position clear of the back wall, useful when the rear wall is close and reflective |
These are rough guides, not physics. The 38 percent rule in particular was written for speakers near the front wall, so applying it blindly to a desk against a side wall gives you an answer that means nothing. Measure, sweep, and move your seat based on what the measurement says.
3. Angle the Speakers Toward the Listening Position
Toe-in means rotating each speaker inward so the tweeter aims at your head rather than down the room. About 30 degrees is the widely used starting figure, which is what you get for free when the triangle is equilateral and your speakers sit forward of the listening plane.
Do not over-rotate. Some people angle them in hard until they point at their ears from any lean, and that narrows the stereo image. Aim them at a spot roughly a foot behind your head position, which keeps the image open while centering the direct sound.
How do you know it worked? Play something with a hard-panned element, or a mono source with a strong centered vocal. If the image sits slightly behind the speaker plane rather than floating between your speakers, the toe-in is right. Too little toe-in puts the image wide and slightly forward.
4. Align Tweeter Height With Ear Level
Sit in your chair where you will actually work, and measure the height from the seat surface to the top of your ear. That is your tweeter height. Most people land somewhere between 43 and 48 centimeters, but measure rather than guess.
Use a stand with adjustable height or a wedge under the cabinet. On foam isolation pads, the tweeter may already sit close to correct, which is one of the quieter benefits of pads.
Then check the two things that quietly break ear level. Is the desk itself level? A desk that has been assembled with one leg slightly shorter tilts one speaker a fraction of a degree and nothing else in the room will ever quite feel right. And is your head centered between the speakers when you are sitting normally rather than leaning toward one side of the interface?
Standing or slouching during critical listening changes the perceived response. Low frequencies are less directional, so the bass mostly stays put, but the midrange and the stereo image shift noticeably. Sit down when you are making a decision.
5. Control Nearby Reflections and Speaker Vibration
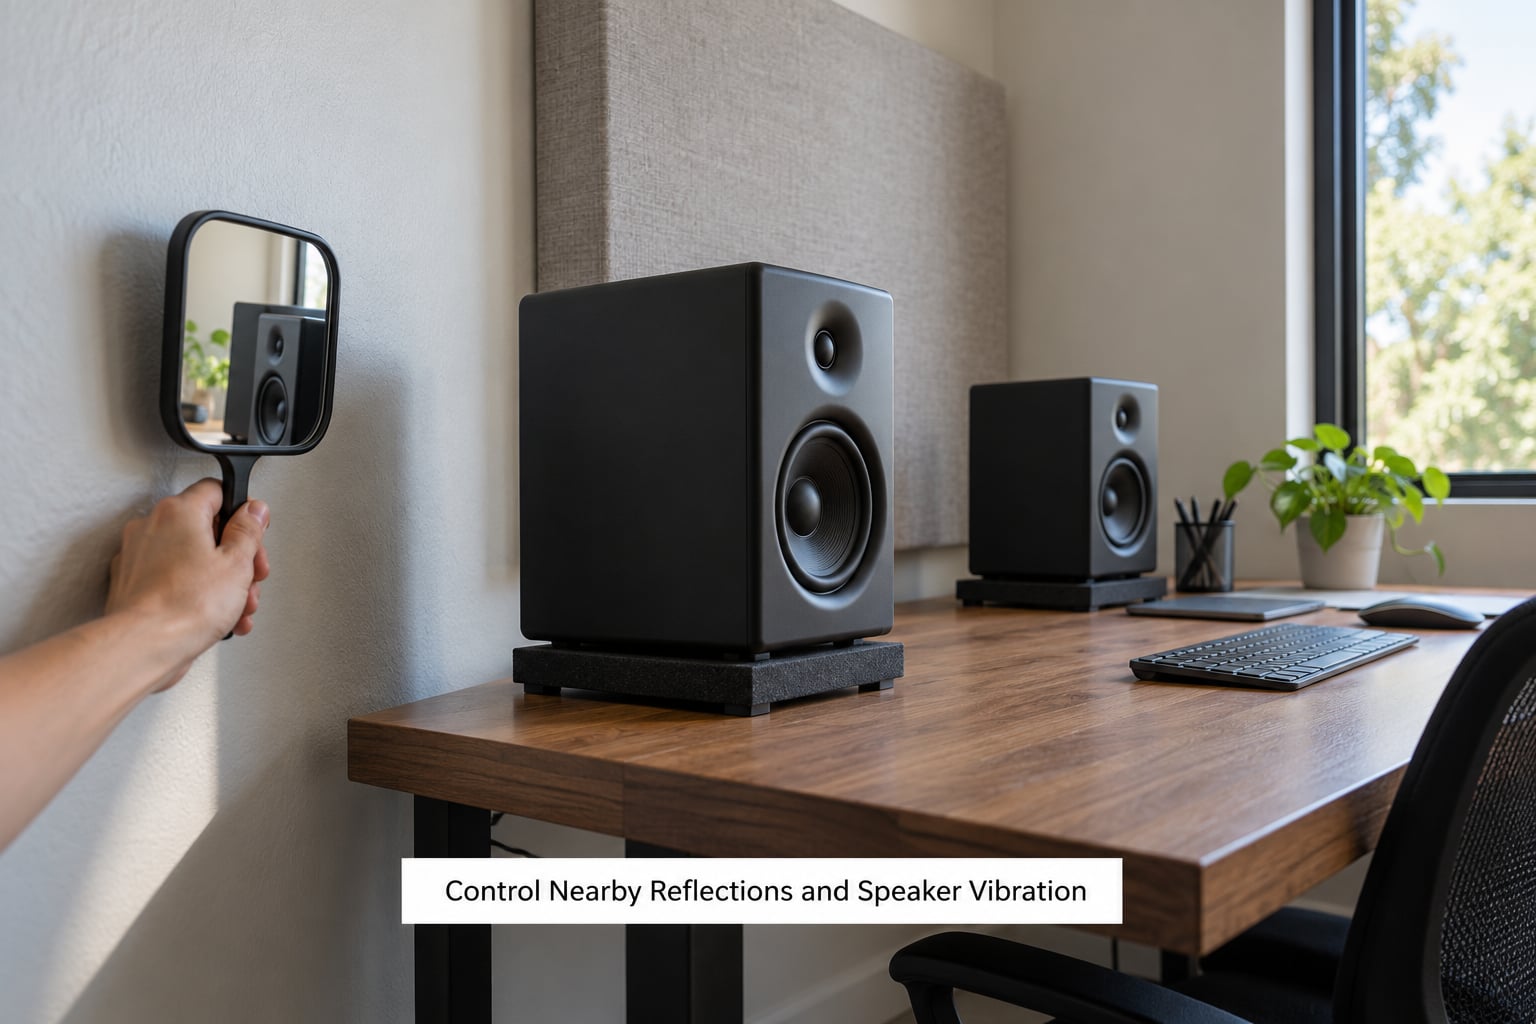
You hear each monitor twice at your ears: once directly, and once off whatever surface is nearest it. Put a mirror flat against the side wall, sit in your chair, and look at the mirror. Where you see the speaker reflected is your first reflection point.
Each surface causes its own problem, and knowing which one lets you treat the right thing.
- Side walls produce the smeared midrange that blurs vocal and snare body. This is the reflection most people notice as a narrow, pulled-in image.
- The desk reflects from below and smears around 250 Hz, right where a lot of guitar and vocal fundamentals live. Moving the speakers back from the desk edge, raising them, or tilting them down helps more than any panel here.
- The ceiling matters most in low-ceiling rooms. The reflection arrives close enough in time to the direct sound that it mostly adds a smeared, slightly phasey character rather than an obvious echo.
- The front wall behind the speakers pushes low-end energy back at you. This is the wall distance problem from step two showing up as bass.
Treatment is simple: a thick absorber at each first reflection point on the side walls, and one above and slightly behind the speakers if the ceiling is low. Four inches of dense mineral wool or foam bonded to a rigid backer works far better than a thin decorative panel. Thin panels absorb the top and do little else, which is why they can make things worse.
One honest limit. In an untreated bedroom with sheetrock walls and a soft bed, placement gets you a usable setup, not a great one. If a frequency is genuinely in a null, no amount of repositioning or absorption brings it back. Accept that, and make mix decisions accordingly.
For vibration, decouple the speaker from whatever it sits on. Pads under both cabinets are the cheapest version and they take care of the desk-rattle problem. If you want to go further, put the speakers on stands with a filled base and the stands on the floor rather than the desk.
And do not put a speaker flat against a wall or hard into a corner. Practitioners in the Fractal Audio and GearSpace threads are consistent about this: corner placement excites the room’s lowest modes hardest, and it produces the boominess that makes people reach for a sub they do not need.
6. Verify the Setup With Measurements and Familiar Music
Now check what you built.
Set a reference level first. Play pink noise, put the meter at your seat, and get to roughly 75 dB SPL at the listening position. Somewhere in the 70 to 76 range is a sensible working target. This is not a loudness contest. It is there so that every later change you hear is a placement change, not a volume change.
Run a sweep. With Room EQ Wizard and a measurement mic, play a sine sweep from your interface and watch the response curve. You are looking for three things: a broadly flat middle, no deep hole anywhere in 200 Hz to 2 kHz, and left and right traces sitting close together. Any dip you can hear is a placement problem before it is an EQ problem.
Check the phantom center. Play a mono source with a strong centered element. It should sit dead center and stay solid when you move your head slightly left and right. If it collapses or swings, your toe-in or your distance is off. This one test catches more mistakes than anything else on this page, and it costs nothing.
Swap the speakers. Play a mono file, then turn each one off in turn. If the level jumps noticeably when you switch from left to right, your distances are not equal. This is the fastest check for a triangle that is slightly off.
Listen to something you know. Play two or three tracks you have heard hundreds of times. Not new material, familiar material. You will hear placement changes in the first ten seconds, long before any curve confirms it.
Change one thing at a time. Move a speaker, listen, then move something else. If you move both and pull up the measurement, you cannot tell which change helped.
Room EQ Wizard, Sonarworks, or anything like them come last. They are good tools for smoothing what geometry leaves behind. Using them first bakes the room error into every mix decision you make for the next two years.
Common Mistakes
Most bad monitoring setups are one of these seven things. Here is what each one sounds like and what to do about it.
| Mistake | What you hear | Fix |
|---|---|---|
| Monitors flat against the wall or in a corner | Boomy, uncontrolled low end; everything below about 150 Hz feels bigger than it measures | Pull them 8 to 12 inches off the wall and well clear of the corners |
| Different distance to each speaker | Off-center image; mono sources drift; level jumps when you switch sides | Re-measure all three sides of the triangle and equalize them |
| Listening position off the center line | Narrow stereo image, uneven response left to right | Tape the center line on the floor and put the chair on it |
| No toe-in at all | Wide, forward image; weak center focus; less bass reinforcement | Rotate each speaker inward roughly 30 degrees |
| Tweeters above or below ear height | Fatiguing over long sessions; inconsistent high end between sittings | Measure your seated ear height and set the tweeters to match |
| Speakers sitting directly on the desk | Midrange smear around 250 Hz, desk rattle on bass-heavy material | Add isolation pads or move to stands |
| Judging the mix from across the room | Wrong level; a balance that only works from one spot | Sit in the chair. Every time. |
Two more that are not on the table because they are about the room, not the speakers. A desk that is too shallow forces the speakers forward and pushes them below ear height, which breaks two steps at once. Fix the desk or the layout before you blame the monitors.
And a room that is square or L-shaped will never give you a clean left-right match, because the geometry is not mirrored. Get as close to symmetrical as the room allows and then accept the rest.
Frequently Asked Questions
How far apart should studio monitors be?
For near-field monitors, speakers should sit far enough apart that your head forms an equilateral triangle with them, which usually works out to 3 to 5 feet from each speaker to your listening position. Wide spacing narrows the center image and cuts the stereo sweet spot, while narrow spacing weakens the phantom center and reduces perceived bass reinforcement. Measure all three sides and adjust until they match within an inch.
Should studio monitors be placed close to a wall?
As far off the wall as your setup allows. Common guidance is 8 to 12 inches, and staying clear of corners matters more than the exact number. A speaker close to a wall or in a corner gets a low-frequency buildup that is hard to EQ away. If your desk is too shallow to allow clearance, keep the speakers well away from the side walls and treat the front wall instead.
Do studio monitors need to be at ear level?
Yes, the tweeters should sit at your seated ear height, which is usually around 43 to 48 centimeters for an adult. Above ear level the direct sound reaches you off-axis and the high end dulls; below ear level the same problem appears at a different frequency. Measure from the seat surface to the top of your ear rather than trusting a number, and check that both cabinets are level.
What is the best speaker-to-listener distance?
Between roughly 3 and 5 feet for most near-field monitors, which keeps the direct sound dominant over room reflections. One GearSpace thread frames the useful range as about 1 foot to 3 feet 3 inches from the front of the speaker to the listening position. Use a sweep test to confirm, because a room null in that range can outweigh any rule of thumb.
Should I use isolation pads between studio monitors and the desk?
Yes, pads are one of the cheapest improvements available. They decouple the cabinet from the desk, which cuts mechanical vibration and often removes a midrange smear around 250 Hz caused by the desk surface reflecting sound upward. Foam pads are enough for most home setups. If you later move to stands, keep the pads, since they solve a different problem.
Can room correction software replace proper monitor placement?
No. Room correction software measures the response at one point in one chair and applies filters to smooth it, which means it can only average out what the microphone sees. It cannot fix an unbalanced triangle, speakers pointed the wrong way, or tweeters at the wrong height. Set the geometry first, then use Room EQ Wizard or Sonarworks to clean up whatever remains.
Conclusion
Start with one thing: put masking tape on the floor marking the center of the desk and the spot where each speaker’s front face should sit, then measure the triangle until all three sides match. That single hour does more for your mixes than any plugin you will buy this year.
After that, sit in the same chair for every mix. Reproducibility matters more than any single setting, because the whole point of positioning monitors is having one trustworthy place to listen.
When it is right, write the numbers down: speaker-to-speaker distance, each speaker-to-wall distance, tweeter height, and the toe-in angle. That is what makes knowing how to position studio monitors for accuracy a repeatable skill instead of a one-time guess. In 2026 I keep a note like that on the wall. The next time you move the desk or change rooms, you are starting from measurements instead of guessing, and you will know exactly which 4 inches to put back.